This post may contain affiliate links. Please read our privacy policy for additional information.
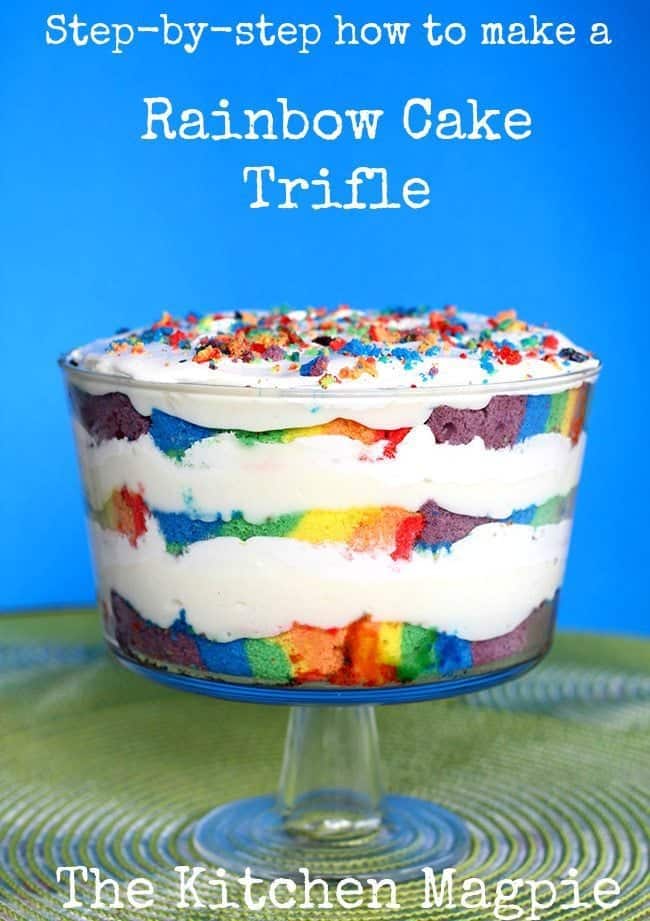
Step by Step how to make a Beautiful Rainbow Cake Trifle! This gorgeous dessert is easier to make than you think! Follow my step by step photos and you will have this on your table in no time! This is just as delicious as my white chocolate strawberry trifle!
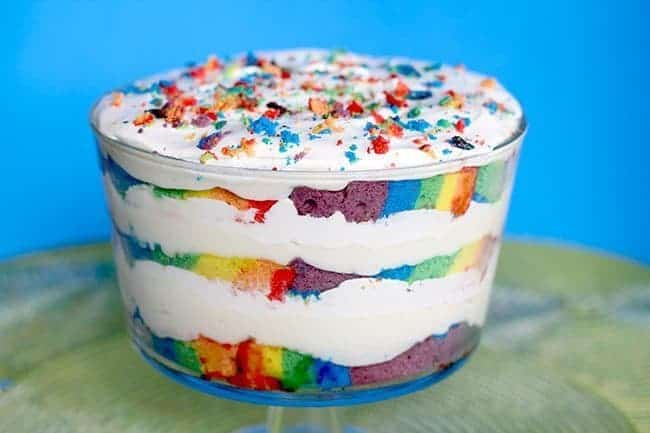
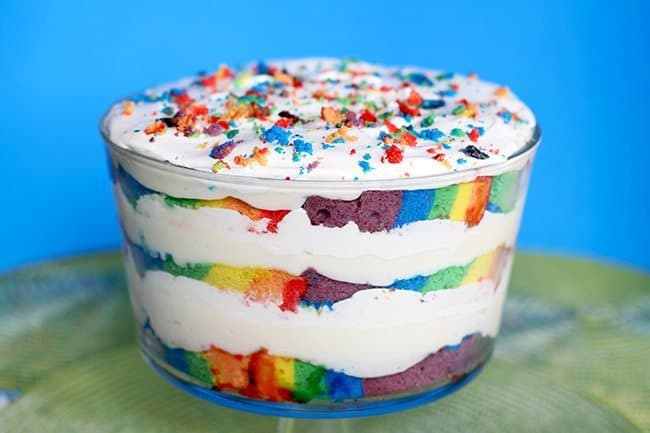
My rainbow cake trifle was the hit of Easter dinner
I could have skipped the Easter ham and mashed potatoes quite easily and just fed everyone this instead. (hmm, now there’s an idea for next year..)Besides the fact that it’s super cute, screams “Hello Spring!” at the top of it’s lungs and makes you want to squeee a little bit due to the joyous colors, it’s also a light, fluffy and delicious dessert. So light and fluffy that everyone had seconds.
To quote my husband:
“I know I am going to hate myself later for this second helping, but I can’t stop myself.”
It’s super easy as well. Since I had to make a large Easter dinner, I wasn’t going for a dessert that required me to make homemade mousse for the filling or bake brownies. Nope, this is pre-made all the way. A cake mix, whipped cream and white chocolate pudding. Dessert is done. Now here’s where I will walk you through the making of the rainbow stripes. I was a little (ok a lot) retentive and wanted to try and make stripes and not just have a tie-dyed cake trifle.
Step by Step How to Bake A Rainbow Cake
- To start, you can whip up one white cake mix according to the package instructions, then divide the batter into 6 cups.I did the ROY G BIV rainbow (excluding the Indigo) to make it a real rainbow. You can decide what colors you want to use and divide the cups accordingly. You remember that right? Red, Orange, Yellow, Green, Blue, Indigo and Violet. ROY G BIV. Dude’s the most well know guy around town.
- Using any cake gels, food coloring or icing gels, color up the white batter.

- You are going to make two cakes, so grease up two 8 inch cake tins.
- Pour half of your red batter into the first one, reserving half for the second cake. Do not push it around, just let it move out naturally to the edges.

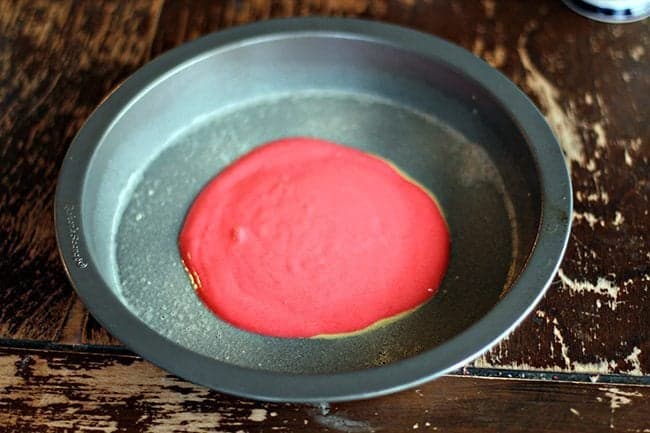
- Pour the orange right in the middle of the red (again, only half of your batter, save half for the second cake) and that’s going to push the red even closer to the edge.

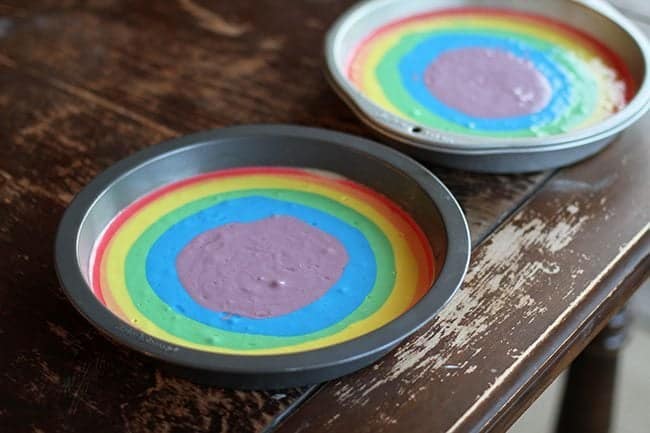
- Keep going with the yellow, green, blue and purple, pout half of each into the very middle until you see a cake like below.
- You can wiggle the pan side to side very slightly to help the batter move out.
- Tap the pan on the table or counter lightly to remove bubbles.

- Repeat with your second cake.
- Bake the cakes according to the package instructions, cool and remove. You can at this point freeze them if you aren’t making the trifle right away.
How to Assemble the Rainbow Cake Trifle
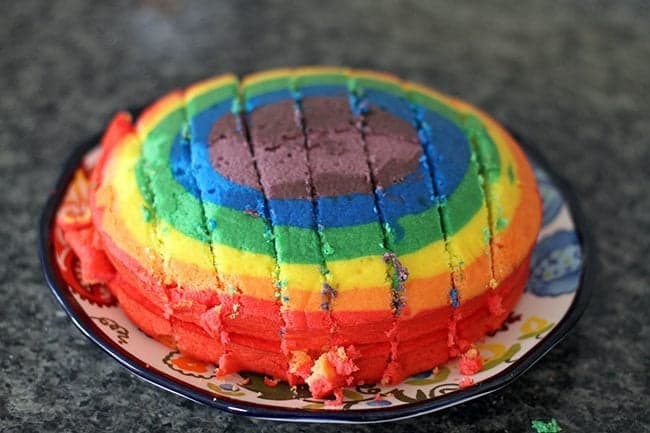
- The secret to the rainbow is shown below. It’s all about the direction you cut the cake!
- Slice your cake exactly as shown below and you will have gorgeous rainbow slices.
- Place the best looking center pieces that are full rainbows on the edges like shown below. Then you fill in the middle of the trifle with the pieces of cake that aren’t full rainbow slices.
- To make each layer, place the cake layers down, put a third of the white chocolate pudding on top, then a third of the whipped cream. Then start another cake layer and repeat two more times.
- You end up with this delicious beauty!
So light and fluffy, so easy to make, I’m totally in love with this dessert.
Happy baking everyone! Give this one rainbow cake trifle a whirl this weekend!
If you are looking for other desserts try my:
Love you more than rainbows,
Karlynn
How To Make A Rainbow Cake Trifle
Ingredients
- one box of white cake mix and ingredients to make it
- food coloring
- 3 cups of whipped cream I used Cool Whip
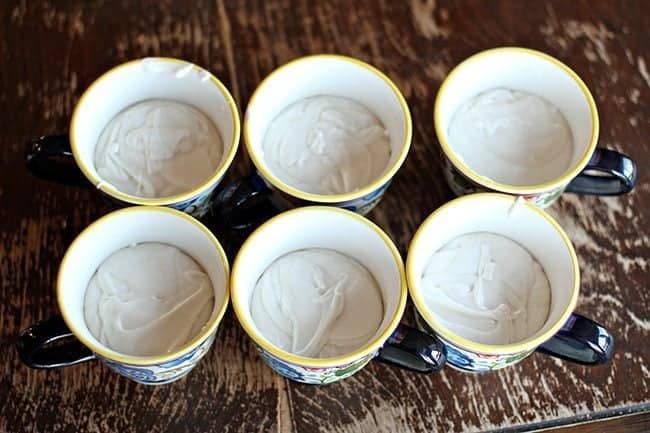
- 2 packages of Jello White Chocolate Instant Pudding . prepared according to package instructions.
Instructions
- whip up one white cake mix according to the package instructions, then divide the batter into 6 cups.
- Using any cake gels, food coloring or icing gels, color up the white batter.
- You are going to make two cakes, so grease up two 8 inch cake tins.
- Pour half of your red batter into the first one, reserving half for the second cake. Do not push it around, just let it move out naturally to the edges.
- Pour the orange right in the middle of the red (again, only half of your batter, save half for the second cake) and that’s going to push the red even closer to the edge.
- Keep going with the yellow, green, blue and purple, pout half of each into the very middle until you see a cake like below.
- You can wiggle the pan side to side very slightly to help the batter move out.
- Tap the pan on the table or counter lightly to remove bubbles.
- Repeat with your second cake.
- Bake the cakes according to the package instructions, cool and remove. You can at this point freeze them if you aren’t making the trifle right away.
- Prepare the pudding mixes according to the package instructions and let set.
- The secret to the rainbow stripes is shown in the photos. It’s all about the direction you cut the cake!
- Slice your cake exactly as shown in the photos and you will have gorgeous rainbow slices.
- Place the best looking center pieces that are full rainbows on the edges like shown in the photos.Fill in the middle of the trifle with the pieces of cake that aren’t full rainbow slices.
- To make each layer, place the cake layers down, put a third of the white chocolate pudding on top, then a third of the whipped cream. Then start another cake layer and repeat two more times.
- Top the whipped cream with leftover rainbow cake crumbs.
- Refrigerate at least 6 hours but it’s far better if you make this the day before and refrigerate it overnight.
Notes
Nutrition
Nutrition information is automatically calculated, so should only be used as an approximation.

Pin this recipe to your DESSERT Board and remember to FOLLOW ME ON PINTEREST!


Ali says
I made this trifle for a holiday dinner and it was an absolute hit. I added a layer of raspberries, blackberries and sliced strawberries to it and it was just divine.
I often make desserts for our get-togethers and I like to try new things, but everyone loves this dessert so much I’m practically never allowed to bring anything else anymore! It’s so easy to make that I feel almost guilty for how much everyone loves it haha. Definitely recommend everyone try it; your friends, family and especially your taste buds will thank you.
J Knight says
Loved it!
Genessi Beachell says
Damn….looks like I gotta step up my game… Elisabeth
Renee Lukie says
Mikaela Lukie for your love of trifle
Karla Hennebold says
This was a BIG hit for this 9 yr old 🙂 Many thanks~
Sarah Langille says
I made this for my daughter’s birthday last weekend and it blew everyone’s mind, especially the birthday girl’s! I was also impressed with how easy it was to make….your instructions are the bomb! Thanks!
thekitchenmagpie says
AWESOME!!! Sometimes we bloggers can think something is easy and it’s not for everyone else, I’m glad that this one worked out!
Kelly says
I’m not sure if you can ask questions in the comment section but I’m about ready to make this for Christmas day dessert after dinner and was wondering if I should wait until tomorrow which is Christmas Eve to make it or is it OK if you make it two days prior
Karlynn Johnston says
Yes! Trifle is even better after sitting for 2 days!
Gil Livesay says
A party in a bowl. Looks great.
The Kitchen Magpie says
And it was super tasty!
mdavis831 says
So do you mix the prepared pudding and cool whip together or just the pudding mix (powder) and cool whip?
KitchenGoddess3 says
How cool is this! Really glad I stumbled across it. Pinned for later 😉
The Kitchen Magpie says
That’s fabulous to hear!’
Chantel Mcevoy says
Deanne Rutherford. This is so adorable.
Cindy Taylor says
This is what I made last year at Easter and it just about turned out just like the picture. It was not hard to make.
Li Ro says
hmm I will have to make this for them
Li Ro says
looks cool
Kristy Young says
Li Ro kids would love this!
Stacie Ward says
Beautiful, you make it look so easy. Thank You for your recipes.
Shannon Ebbesen says
Leah Storrow this looks like something Abby would make
The Kitchen Magpie says
I am NOT a cake pro! So when I say you can do it, you totally can!!
The Kitchen Magpie says
The recipe is for cakes, just stack them together! Little cups can be done as well, a little more fiddly but cute!
Skye Andriske says
Alli Martin you could do this in small clear drink cups for mias bday?? Or i think it would be a cool bday cake?
mrsFuzz says
i’m planning on making this with red and green stripes for Christmas – thanks for the idea 🙂
SabineVan says
This is beautiful Karlynn! is there a way to make this but using a 9×13 pan for a birthday cake? I am having trouble visualizing to see how the stripes would go to cut pieces for party goers to have the full rainbow effect!
thekitchenmagpie says
SabineVan Stripe-wise it doesn’t work out the same, but you could just make it a tie-dye cake then instead…do two circles in the pan, one on each end and the batter would connect. Stripes would be a little bit hard.
Judy B says
One picture of just the cake layer would help a LOT.