
This post may contain affiliate links. Please read our privacy policy for additional information.
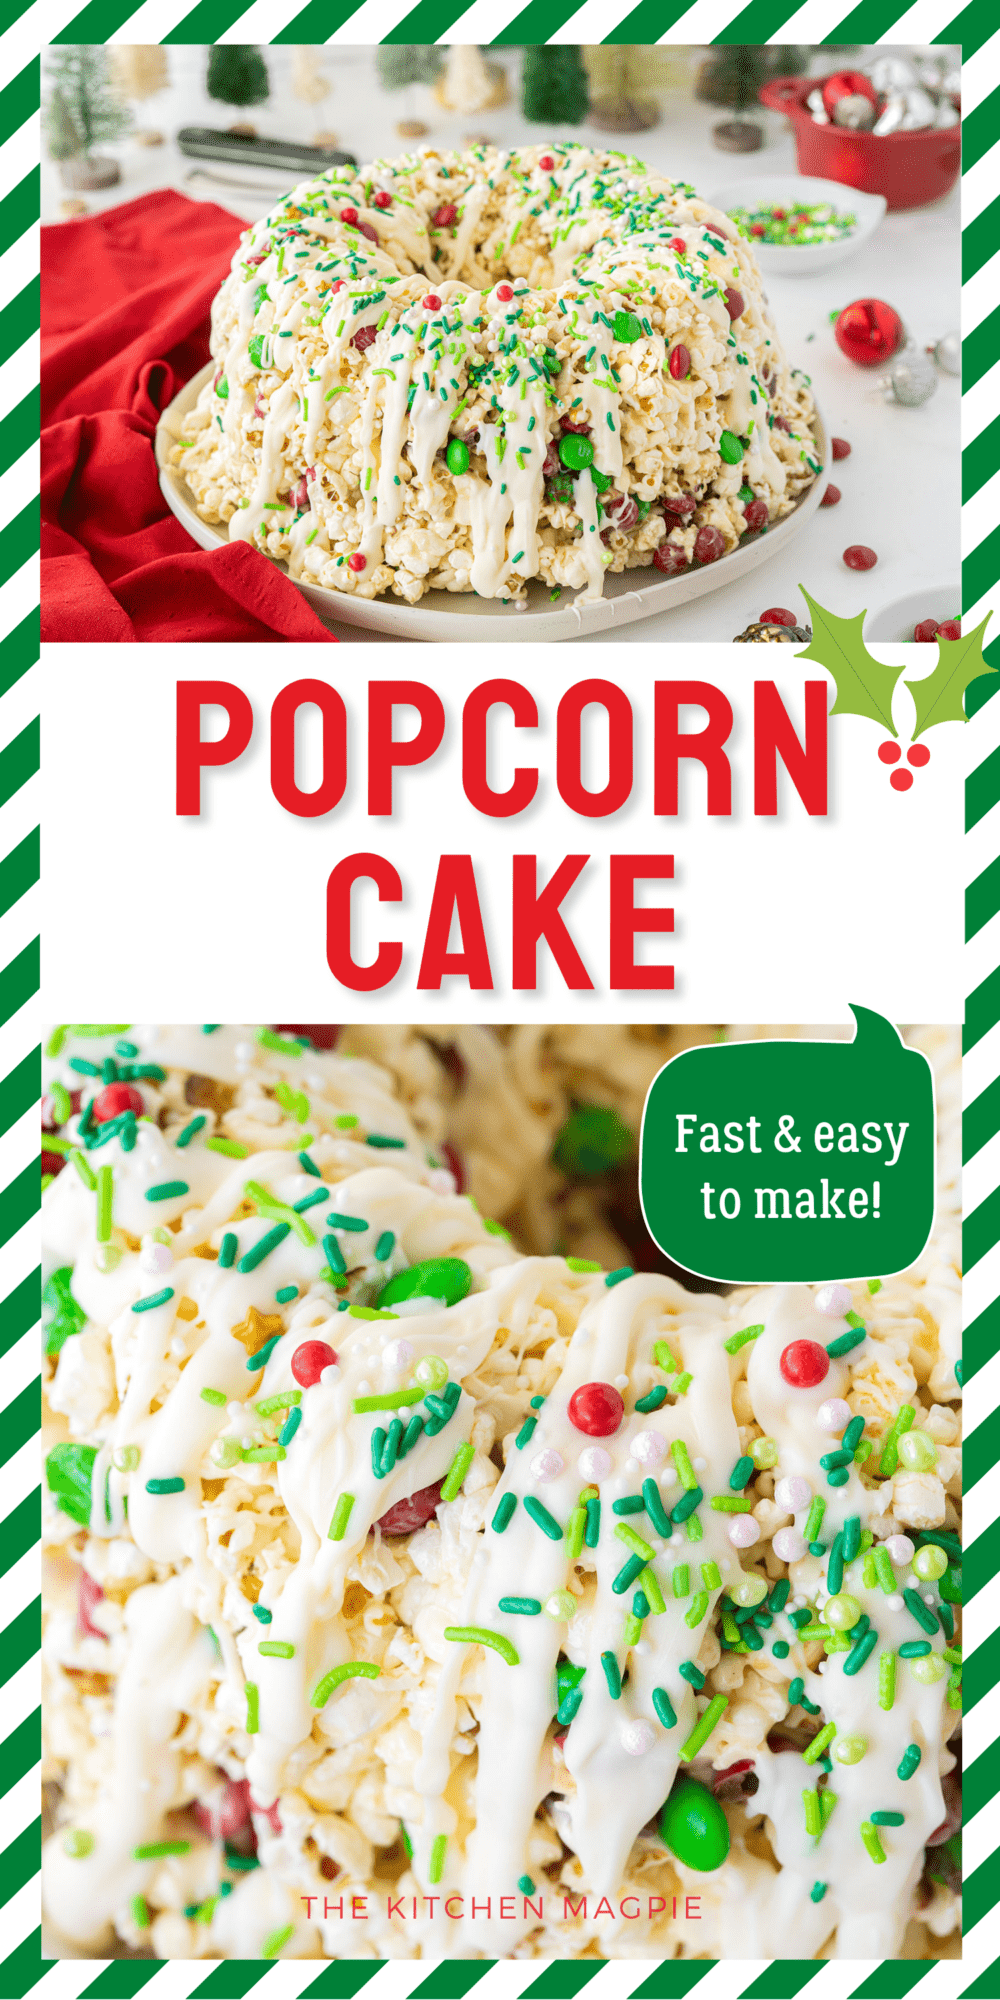
Crunchy, sweet, and easy to make, popcorn cake is a hit with kids and adults alike! You can adjust the candies according to the occasion, from Christmas to birthdays, for whatever you need!
For more delicious cake recipes, why not try some Blueberry Buckle? Or some Cinnamon Spice Upside Down Apple Cake instead?

Popcorn Cake
Cake recipes can sometimes be insanely complicated and frustrating. You need all kinds of different ingredients and complicated cooking steps, and it seems like no matter what you do, everyone has different tastes and wants something different.
This recipe for popcorn cake, however, cannot help but please everything.
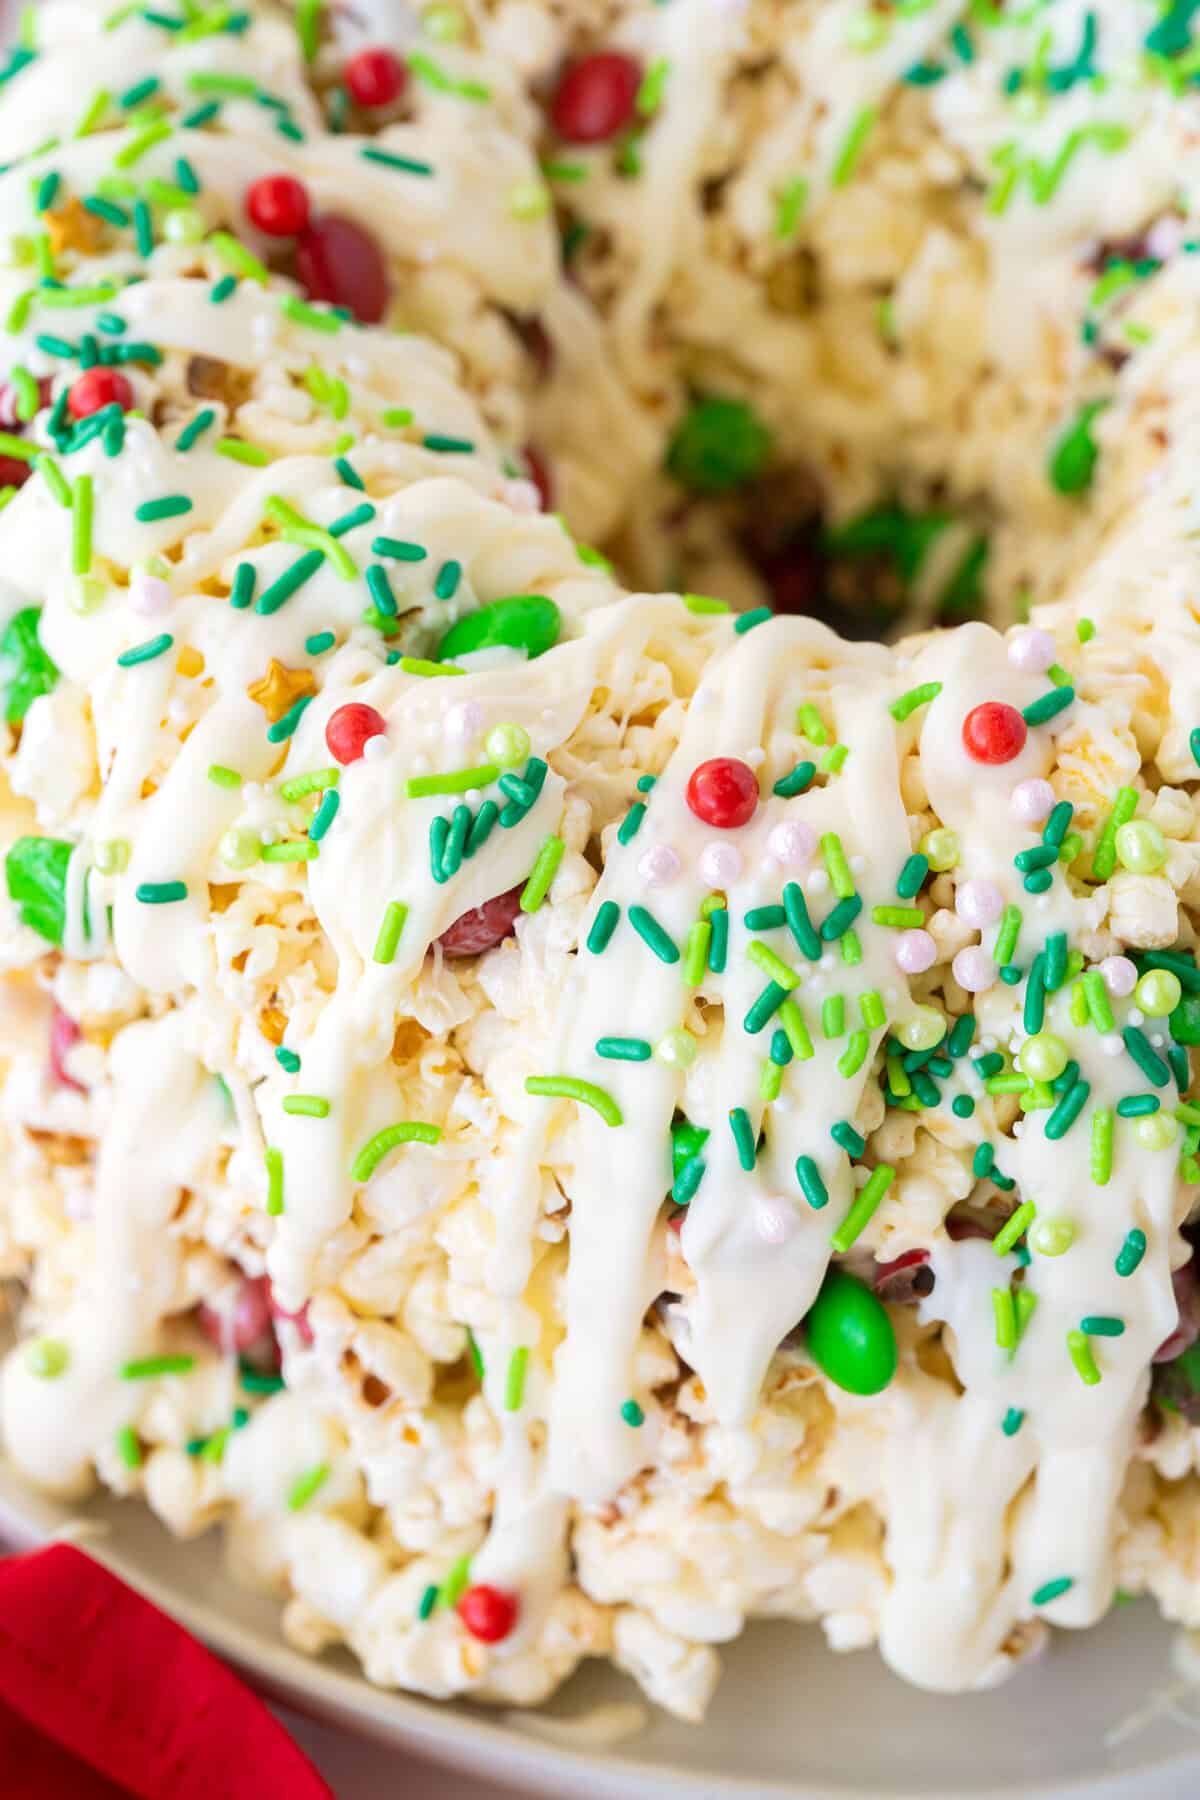
It is crunchy from the popcorn and candies, sweet and decadent from the marshmallows and rich from the butter. It is the epitome of a textural experience, and you can’t help but be reminded of the kind of desserts you ate as a kid at class parties. It is basically like a giant rice crispy cake, only with way more candies and popcorn instead of rice; what’s not to like?
Popcorn Cake Ingredients
Make sure you look at the recipe card at the very bottom for the exact amounts so that you know exactly what to buy for this recipe.
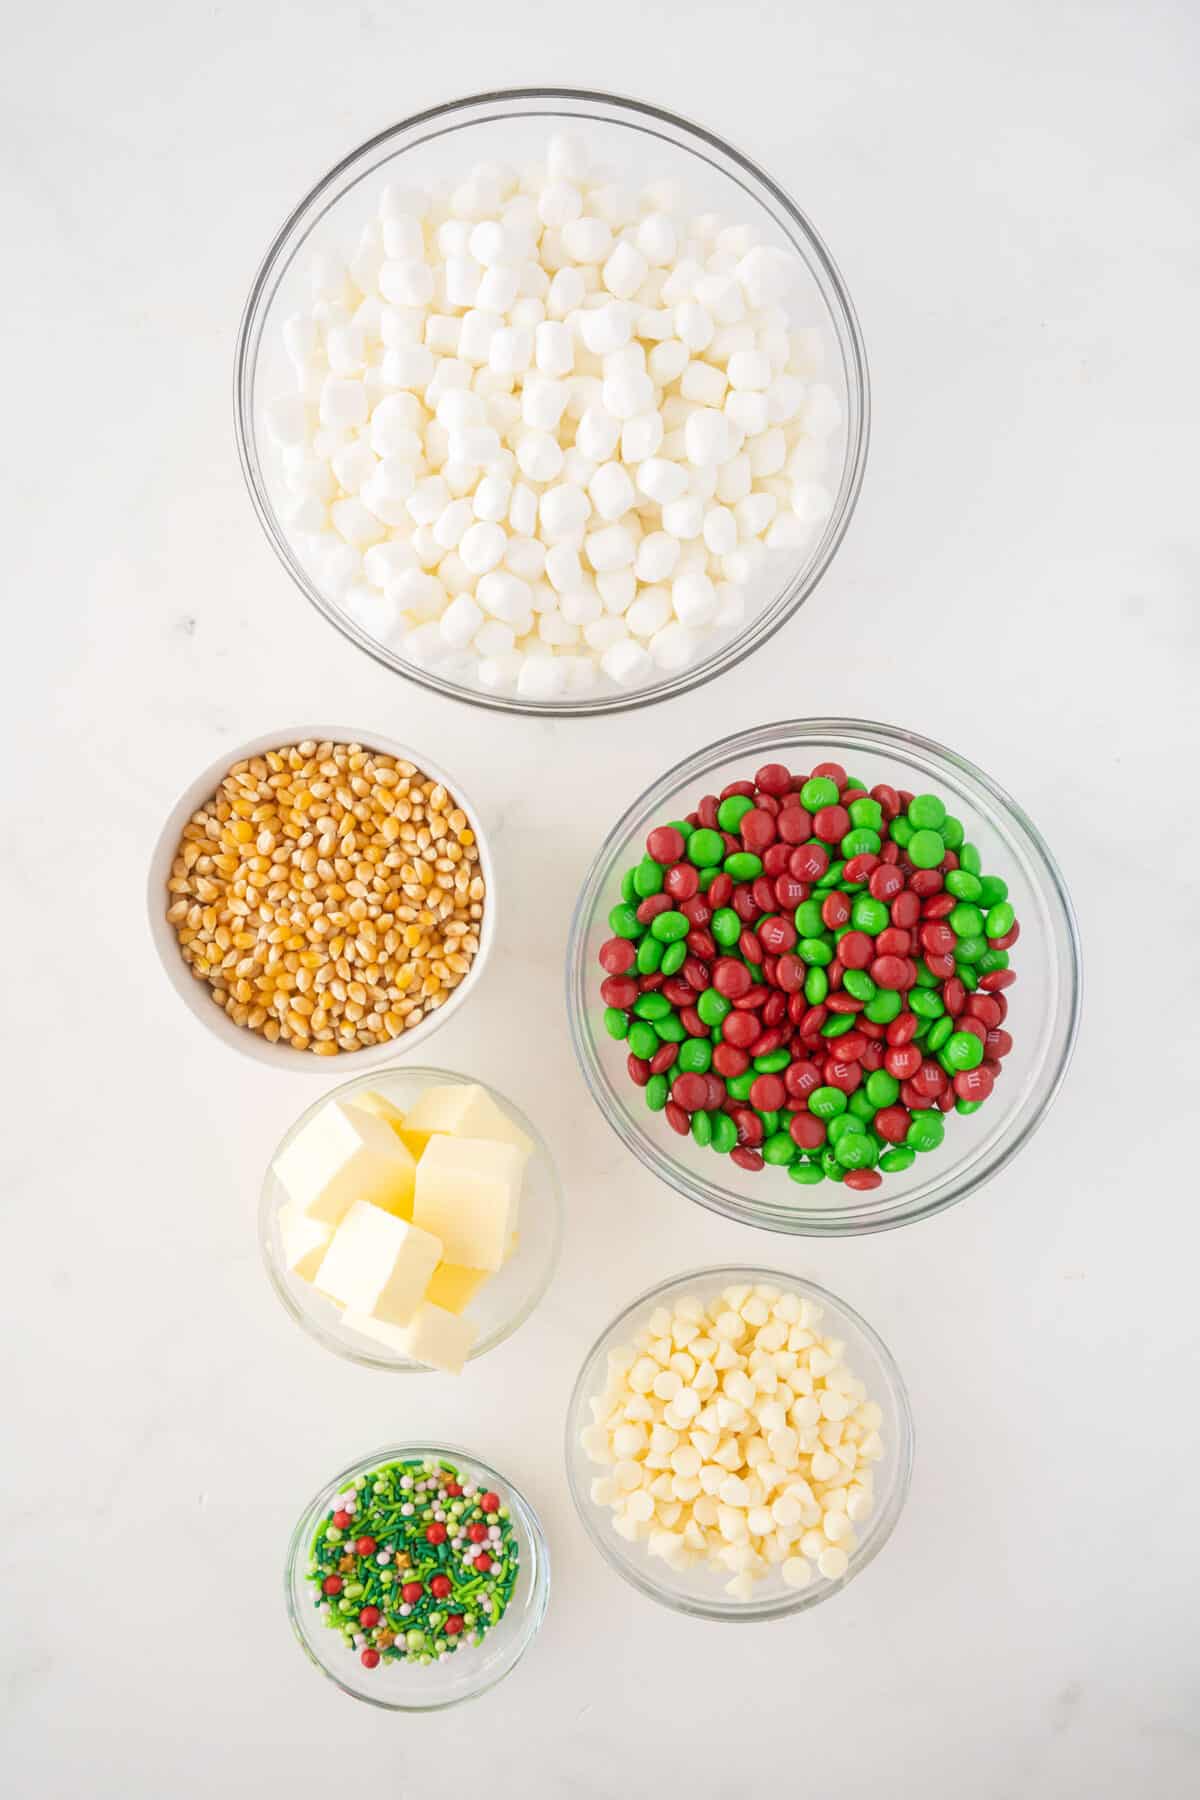
• Miniature marshmallows package
• Butter
• Popped corn (made from about 1 cup of kernels
• Christmas M&M Candies
Toppings
• Chocolate chips, either white or milk chocolate
• Melting disks in assorted colors
• Sprinkles to match
How To Make Popcorn Cake
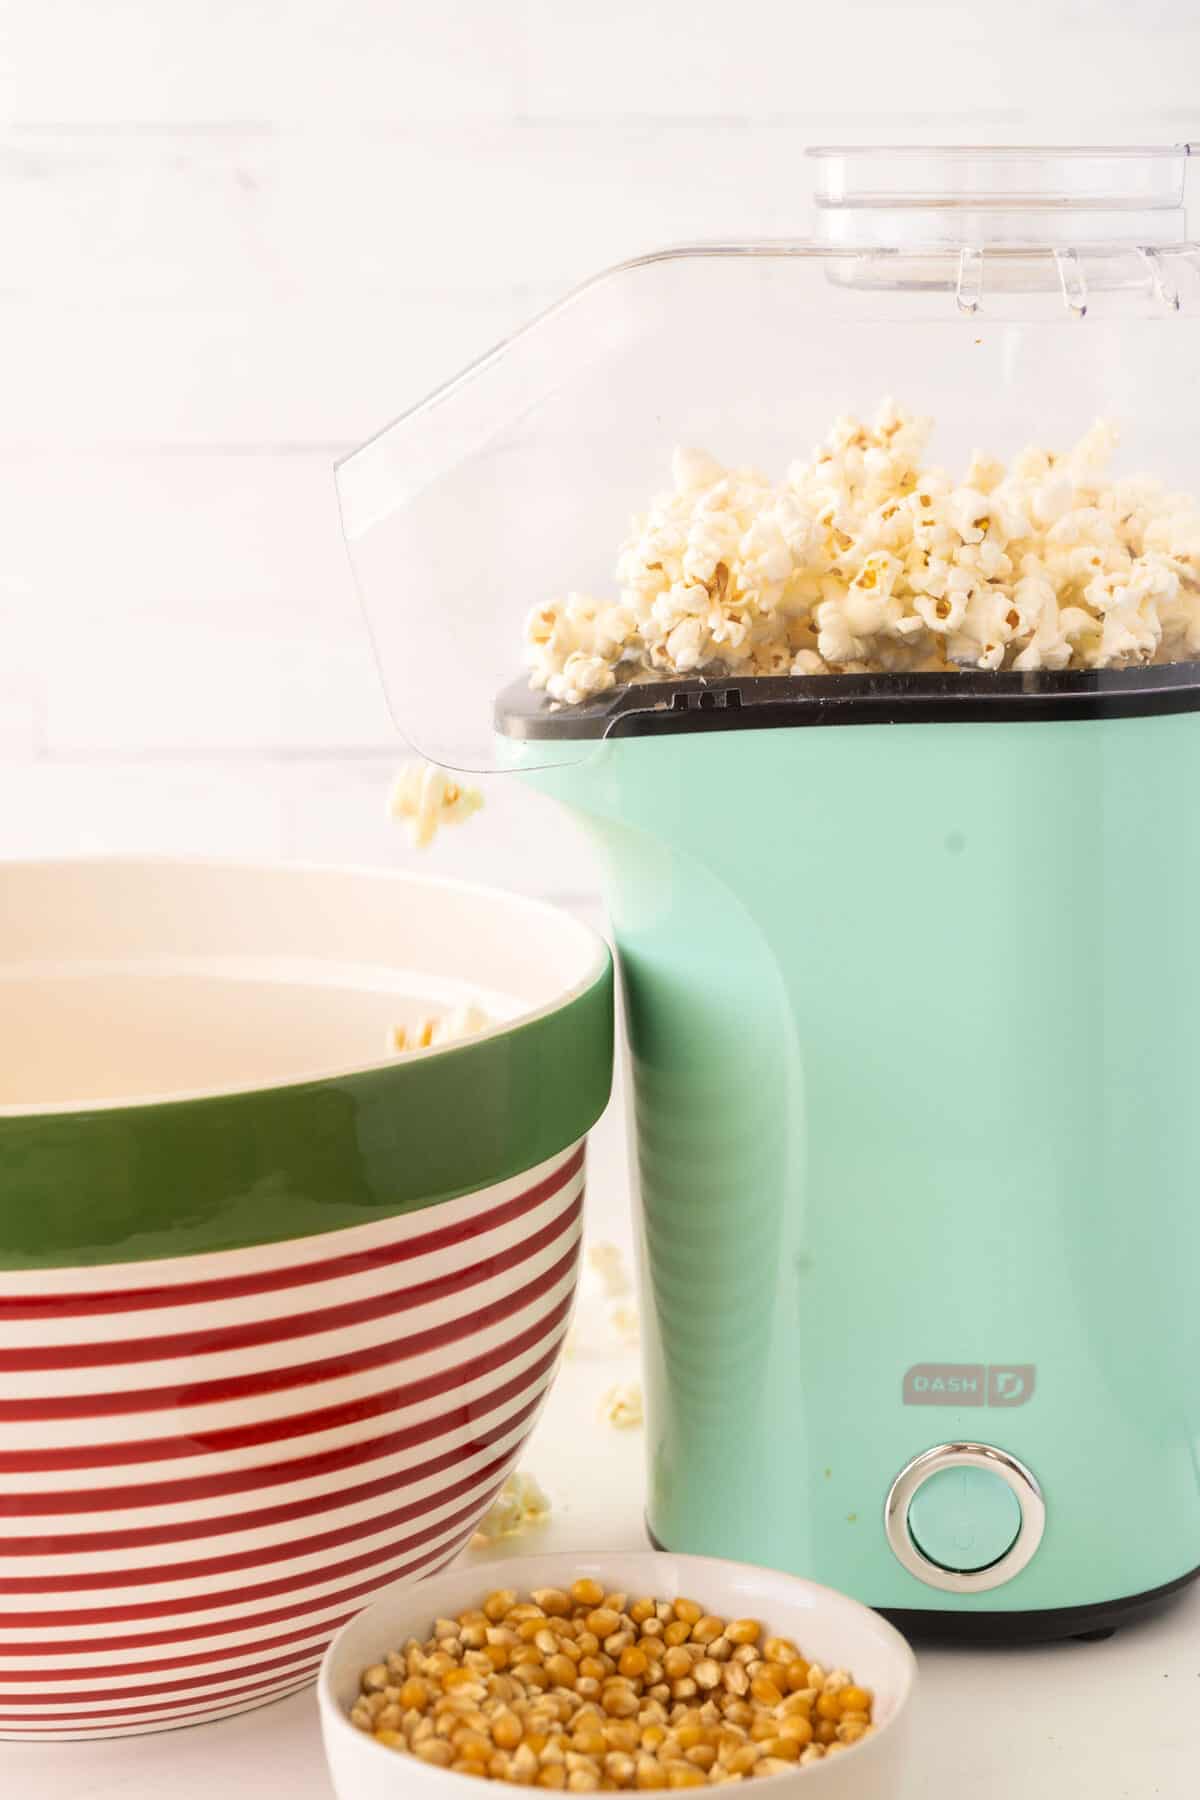
• Pop the popcorn, being careful to remove all the kernels
• Place the popcorn into a very large bowl and set aside
• Spray a bundt pan with flavorless cooking spray
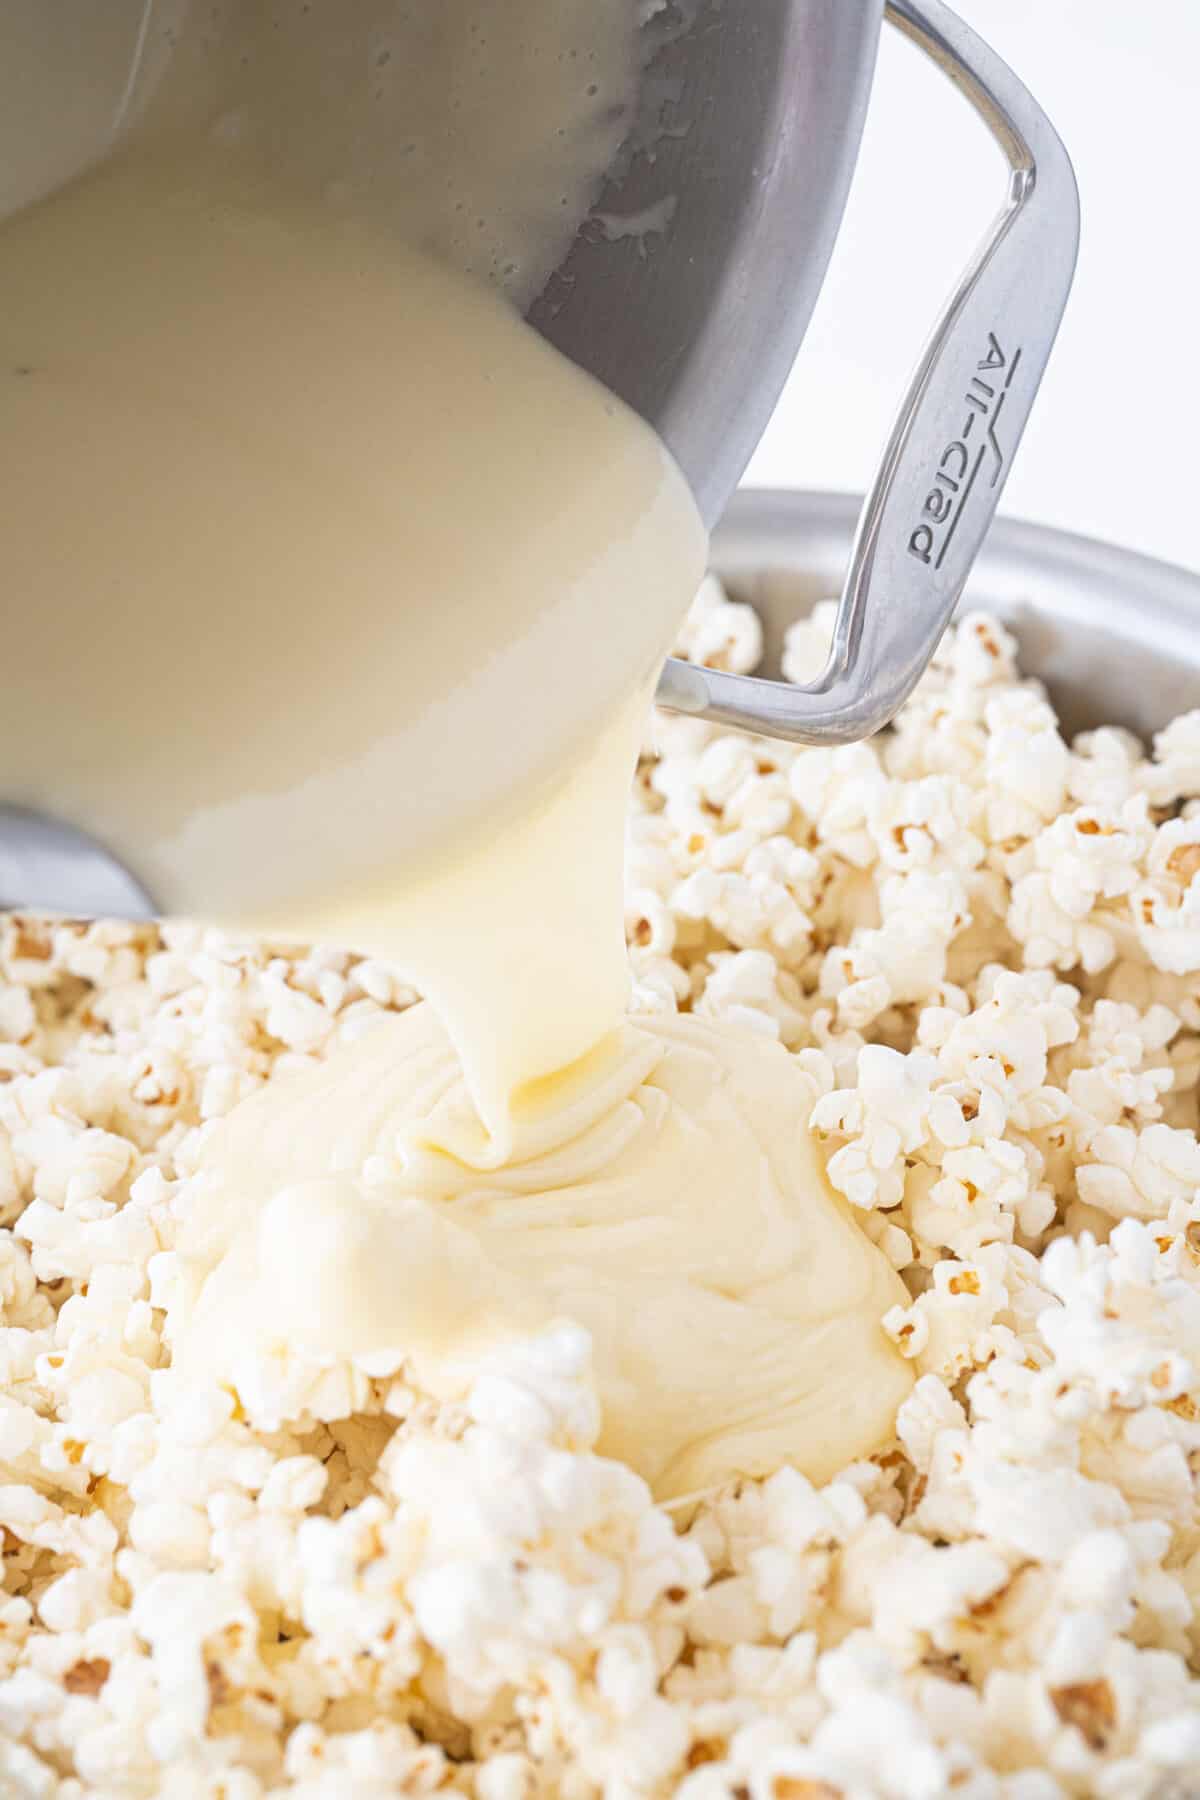
• Combine the marshmallows and the butter in a 5-quart saucepan over low heat
• Stir until the marshmallows are totally melted and then remove the heat
• Pour the melted mixture over the popcorn in the bowl
• Mix together with the corn until everything is well covered
• Mix in any chosen candies you want
• With well-buttered hands, press the mixture into a Bundt pan, cover with plastic wrap, and chill for an hour or so minutes
• Remove from Bundt pan onto a serving platter
• Melt your chosen chocolate and then drizzle it over the top of the cake
• Sprinkle the sprinkles over everything just before the chocolate sets and then serve once hardened
How To Ensure You Don’t Get Any Unpopped Kernels In Your Popcorn Cake
Nothing is worse when eating some popcorn than accidentally biting down on a hard, brittle, unpopped corn kernel.
It seems like no matter what you try and do, there is always a few unpopped kernels left after making popcorn; it is basically unavoidable.
To try and minimize the risk of breaking your teeth, make sure to switch your popped popcorn from your cooking vessel into another bowl. This lets you leave behind a good number of kernels because they are way denser than the popped corn.
To really be thorough, put them in a really big bowl and gently swirl the bowl around a few times, and then decant them once more into a different bowl. The movement will help the kernels to fall to the bottom, letting you completely leave them behind.
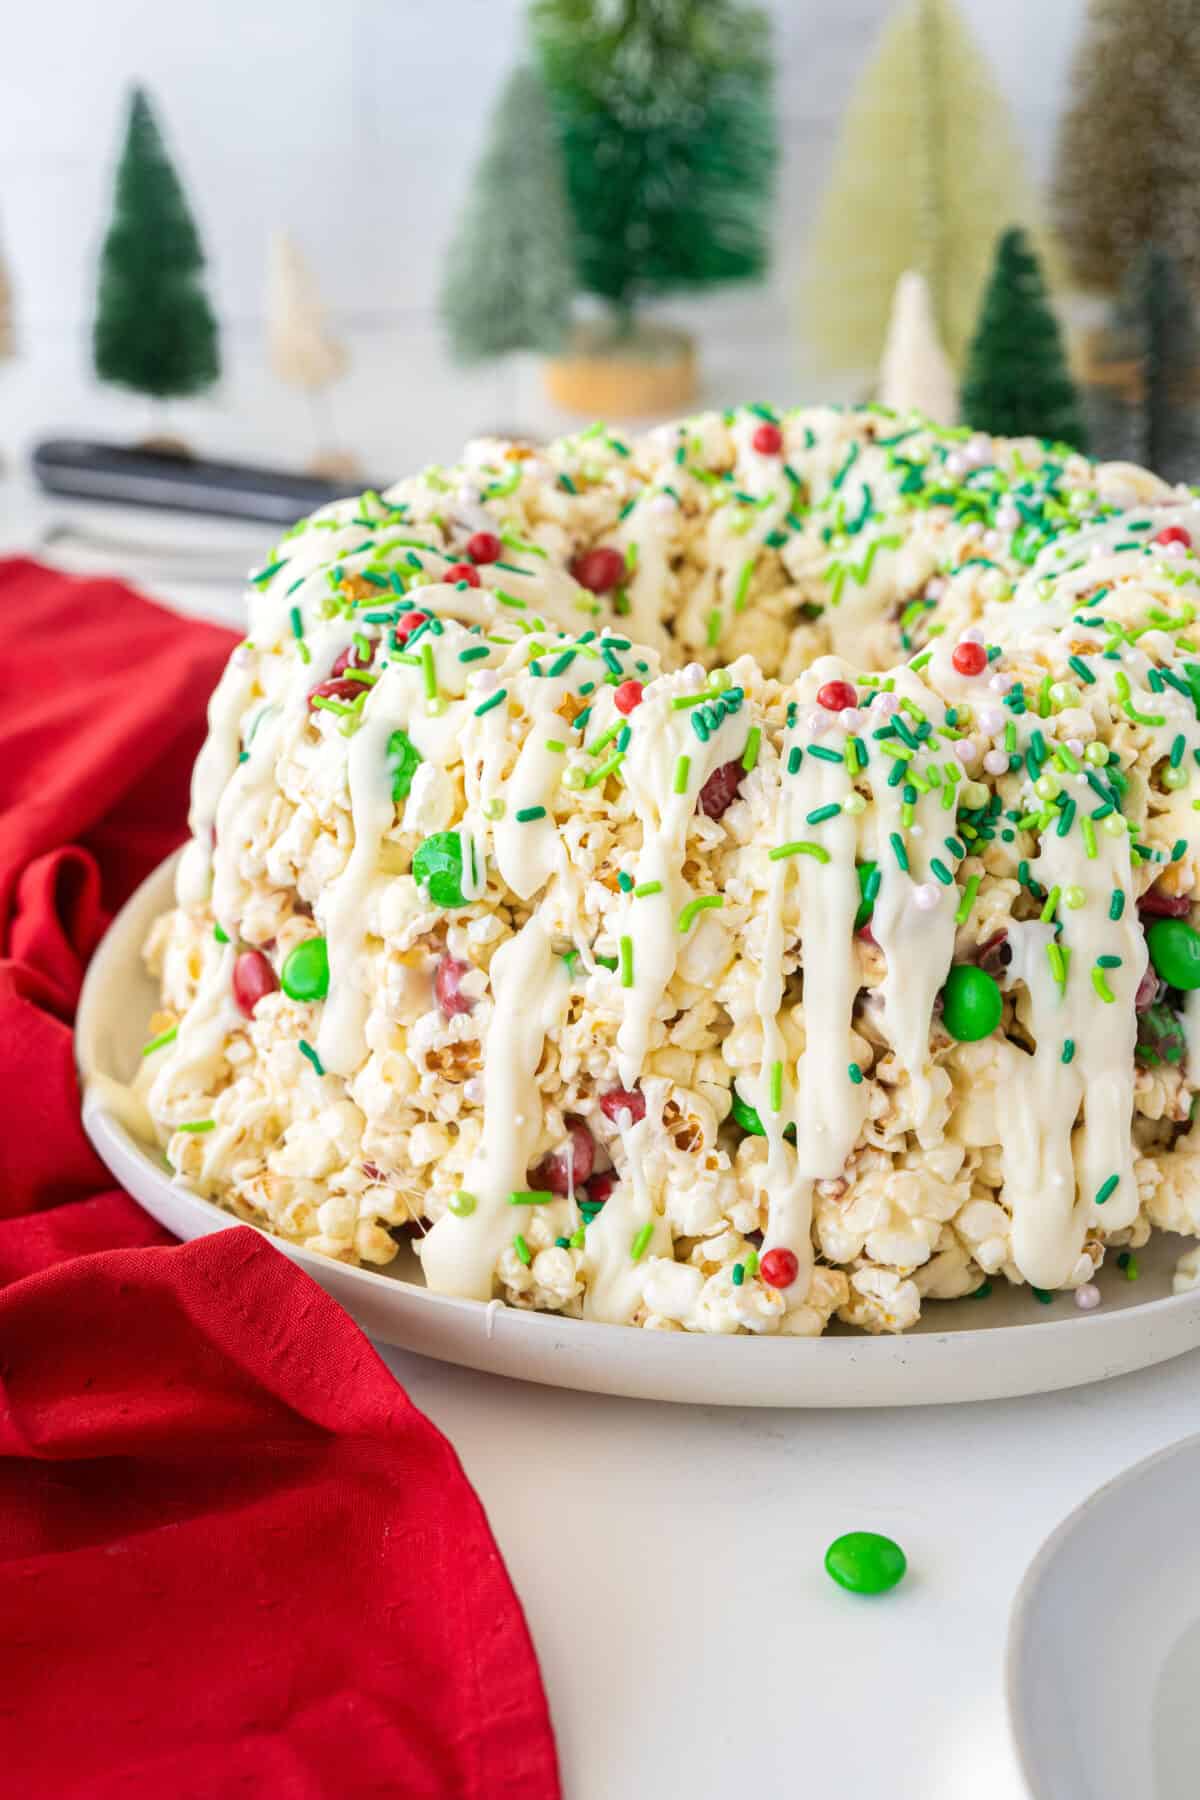
How To Stop Your Popcorn Cake Sticking To Your Bundt Pan
This recipe advises using a Bundt pan to make your popcorn cake, primarily because of its attractive appearance and how easy it is to cut Bundt cakes into shareable portions.
Unfortunately, though, the mixture is super sticky thanks to all the marshmallows and butter and can set up pretty rigid after sitting in the fridge.
To stop it from sticking to the pan, make sure that you are really liberally spraying it with cooking oil. Don’t be afraid to get a little vigorous if it is still sticking, and use a small silicone spatula to try and get under the cake to lift it out.
If anything breaks off as you are lifting it out, just press it back into its place; no one will be able to tell.
Looking for more delicious Cake recipes? Try these out:
Enjoy!
Love,
Karlynn

Pin This Recipe To Your DESSERT Recipes Board and Remember to FOLLOW ME ON PINTEREST!

Popcorn Cake
Ingredients
- one 500 gram package miniature marshmallows
- 1/2 cup salted butter
- 18 cups popped corn,
- 1 package Christmas M&M Candies , or similar candy, choosing color to match the holiday
Toppings
- 1/2 cup chocolate chips, white or chocolate
- 1/2 cup melting disks, assorted colors
- sprinkles, color to match occasion
Instructions
- Pop the popcorn, and carefully remove ALL kernels! Place in a very large bowl and set aside.
- Spray an angel food cake pan with flavorless cooking spray.
- Combine the marshmallows, and butter in a large saucepan over low heat, stirring until the marshmallows are melted. Remove from heat.
- Pour the melted mixture over the popcorn in the bowl. Mix together until the popcorn is covered. Mix in the chosen candies.
- With buttered hands, press the mixture into the pan, cover with plastic wrap and let it set for an hour or so. Do NOT refrigerate!

- Remove from the pan onto a serving platter.
- Melt your chosen chocolate. Melt then drizzle over the top of the cake. Sprinkle with the sprinkles before the chocolate sets. Let the chocolate set completely, and serve.

Notes
- This is a basic recipe that can be tweaked for any occasion!
- You can adjust the amount of popcorn and marshmallows, add less popcorn for a chewier cake etc
Nutrition
Nutrition information is automatically calculated, so should only be used as an approximation.


Karlynn Johnston says
Thanks for catching that! No chill, just let it SET.
Peggy says
To refrigerate or not to refrigerate… That is the question? In your description above you say to “chill for and hour or so minutes” and mention how rigid it can get after sitting in the fridge but in the instructions it says “do NOT refrigerate!”
Could you clarify which is recommended?