This post may contain affiliate links. Please read our privacy policy for additional information.

Why You’ll Love My Recipe
These cookies are like a mug of hot cocoa you can pack into your lunch box! Chewy, chocolatey, and perfectly portable, once you try them for the first time I know you’ll be adding them to your roster of holiday must-haves!
Good Lord above, do I love Christmas cookies. And Christmas. And these Peppermint Kiss Chocolate Cookies because they are everything that a cookie should be! I have a sordid love affair with the combination of mint and chocolate, so these cookies are pretty tops in my books!
Reader Review
I discovered these last because my son wanted to make and mint+chocolate Christmas cookie. They are my new favorite! Perfect recipe!!
Karlynn’s Recipe Notes
- Skill Level: These cookies are easy to make, and since this recipe makes 36 two-bite beauties, they’re a perfect choice for a potluck, bake sale, or family gathering!
- Total Time: You can have a batch of these cookies ready in just 30 minutes!
- Variations: This recipe makes an excellent base for plain chocolate cookies that are soft and chewy, but the dough is also hearty enough to handle additions like chocolate chips, M&Ms, and even nuts and raisins if you don’t want to put a kiss on top! If you’re not a fan of white chocolate peppermint, you can also use whatever kind of Hershey’s Kiss you like for double-chocolate decadence!
- Tools For This Recipe: You’ll need a large baking sheet, a stand mixer or electric hand mixer to make bringing this dough together easy, and mixing bowls to make this recipe! If you’re a stickler for precision, consider picking up a cookie scoop to make portioning your dough easy!

What You’ll Need for Ingredients
Cocoa Powder: If you have it on hand for other baking, don’t use “Dutch processed” cocoa powder in this recipe! Dutch processed baking powder has had its acid content neutralized, and the baking soda in this cookie dough needs the acidity of your regular, everyday cocoa powder to rise!
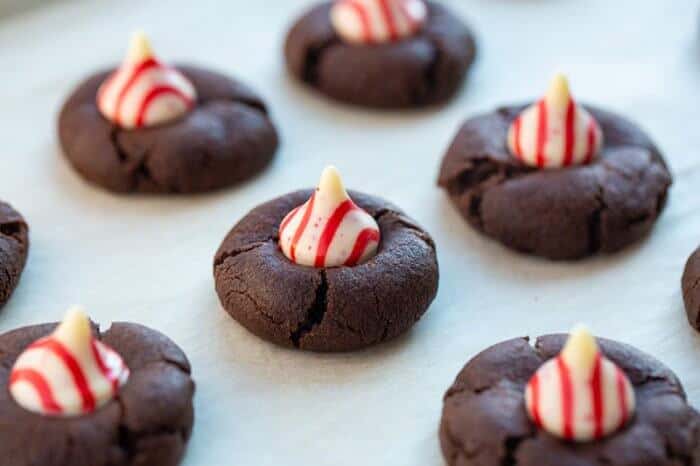
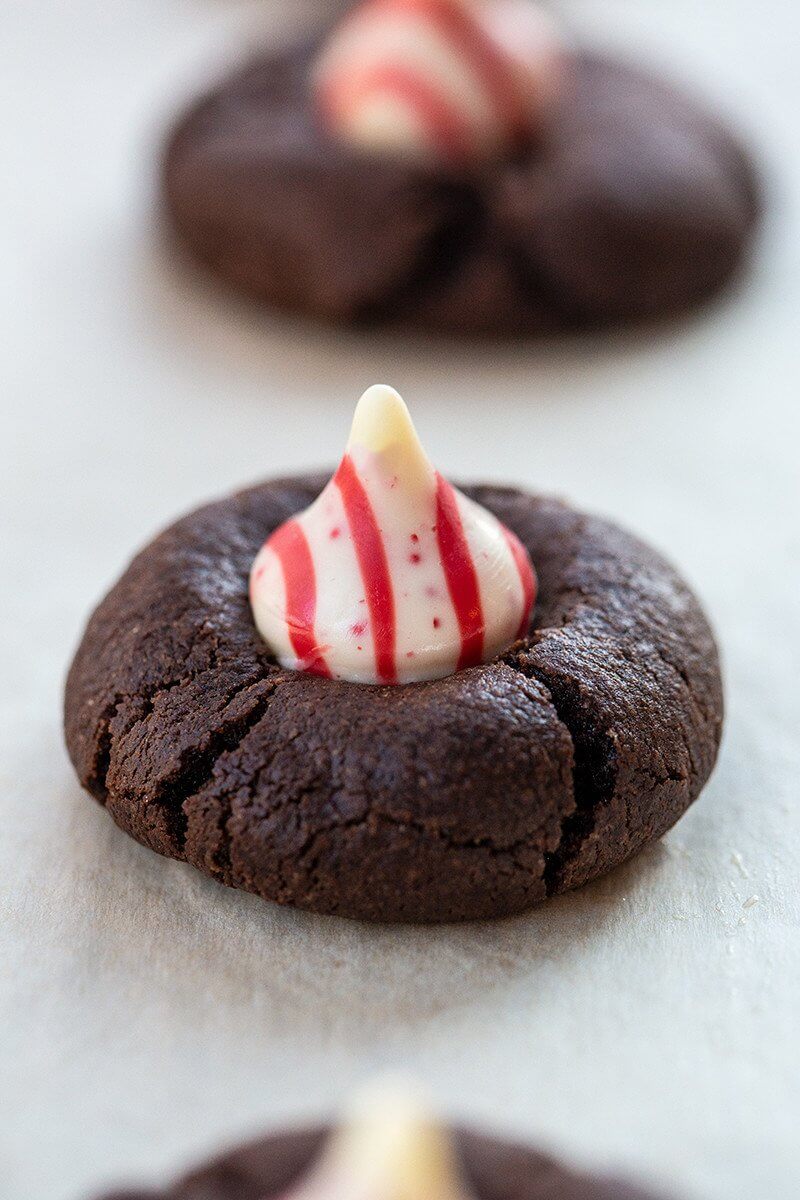
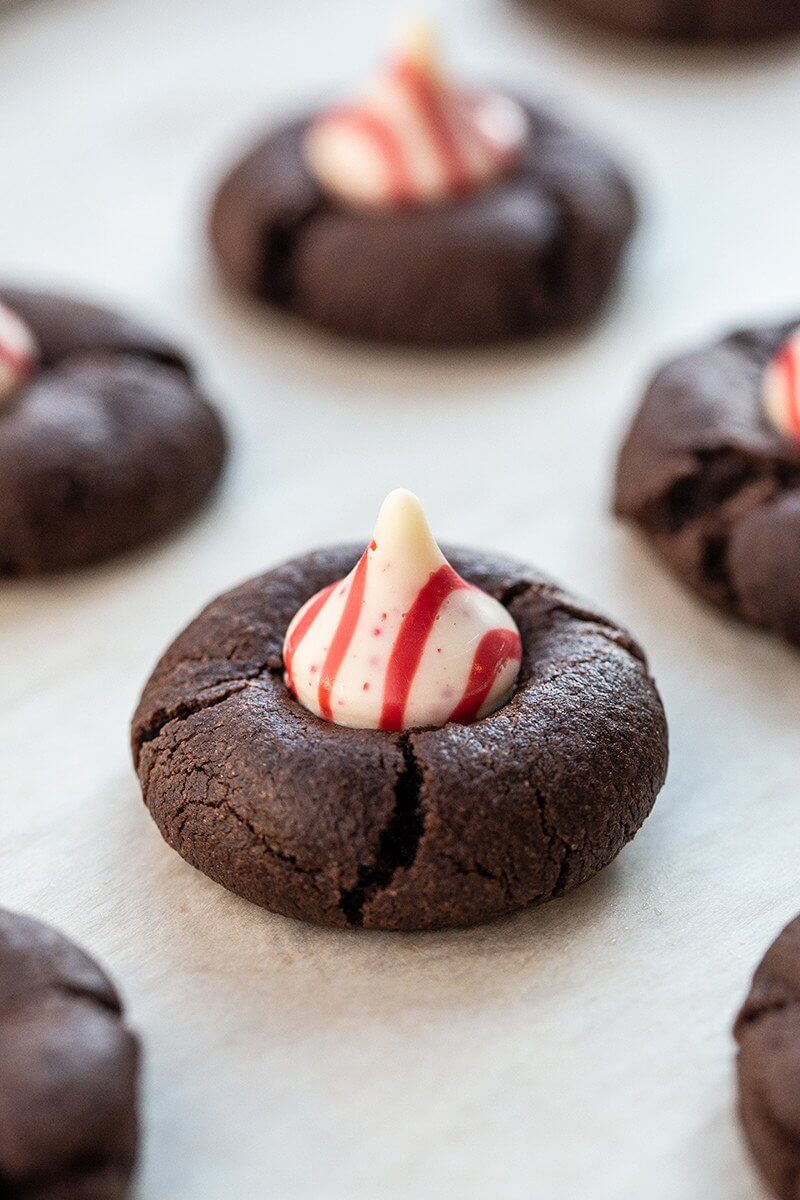
Peppermint White Chocolate Kisses: These candy-striped sweets are what make these cookies something special! Make sure to press them down onto the cookies after pulling them out of the oven, though! The white chocolate has a very low melting point, and they won’t be as cute after they’ve melted into puddles while baking!
White Sugar: I suggest rolling your chocolate cookie balls in a little extra white sugar before you drop them onto the baking sheet and get them ready to bake! This adds a little sparkle that makes them look extra cute when they’re finished.
How To Make Peppermint Kiss Chocolate Cookies
This is a quick overview of the recipe. The full list of ingredients & complete step-by-step instructions are in the recipe card below.
- Preheat your oven to 350°F and line a baking sheet with parchment paper. In a medium bowl, whisk flour, cocoa, baking soda, and salt together and set aside.
- Using a stand mixer or hand mixer, beat the butter and sugar together on high speed until smooth and creamy, about 2 minutes. Add in the egg and beat until fully incorporated, the finally add the vanilla extract.
- Add the dry ingredients to the wet and mix on low speed until thoroughly combined.
- Divide the dough into 1-inch balls, roll in the reserved white sugar and bake 1.5 inches apart for 8-10 minutes. Remove from the oven and immediately press an unwrapped peppermint chocolate onto the top of the cookie, then allow to cool completely.
Karlynn’s Tips and Tricks for the Perfect Peppermint Kiss Chocolate Cookies
- Soft and Chewy: Make sure to underbake these cookies slightly so they stay soft and chewy and don’t turn into hockey pucks! Cookie dough with cocoa in it has a higher chance of drying out while baking.
- Sealed With a Kiss: Press the kisses into the middle of the cookies immediately after pulling them out of the oven! The kiss won’t fuse together properly if they don’t have the chance to melt into the cookie and harden as it cools.
- Room Temp Is Best: Make sure that your butter and eggs are at room temperature to make creaming everything together easy! This is an important step to get the best texture in your final bake.
Storage Instructions
I don’t recommend refrigerating cookies, as the cold circulating air inside of your fridge can make them go stale quickly. Instead, you can store your cookies at room temperature in an airtight container for up to 5 days.
Freezer: If you want to put these cookies into long-term storage, freeze them between layers of wax paper in a freezer safe, airtight container. They’ll keep for up to 3 months!
More Delicious Cookie Recipes
- Try my recipe for classic Chocolate Chip Cookies for a sweet treat that just can’t be beat!
- Looking for more possibilities that use this chocolate dough as a base? Why not give my recipe for Rolo Cookies a try?
- Give my Cookie Press Gingersnap Cookies a try for a retro holiday classic!
As soon as the weather starts turning colder, I’ve got baking on my mind! Recipes like this one are some of my favorites because you can make a big batch of cute cookies with very little fuss!
Give this recipe a try and let me know what your favorite add-ins are in the comments below!
Happy Baking!
Karlynn

Peppermint Kiss Chocolate Cookies
Ingredients
- 2 ½ cups flour
- ¾ cups unsweetened cocoa
- 1 teaspoon baking soda
- ½ teaspoon salt
- 1 cup granulated sugar
- 1 cup brown sugar, packed
- 1 cup butter
- 2 large eggs
- 1 teaspoon vanilla extract
- 36 peppermint white chocolate Kisses, unwrapped
- ¼ cup white sugar, for rolling
Instructions
- Preheat your oven to 350°F. Line a baking sheet with parchment paper.
- In a medium bowl, whisk flour, cocoa, baking soda and salt together. Set aside.
- In a stand mixer fitted with the paddle attachment or in a large bowl using a hand mixer, beat the butter and sugar together on high speed until smooth and creamy, about 2 minutes.
- Add in the egg, then beat until fully incorporated. Then add in the vanilla extract.
- Add the dry ingredients to the wet and mix on low speed until combined.
- Roll the dough into a 1-inch ball.
- Roll the ball in the white sugar and place on parchment paper lined cookie sheet, 1.5 inches apart.
- Bake for 8-10 minutes until the edges are set and baked.
- Remove from the oven and immediately press the peppermint chocolates into the top of the cookie. Let cool completely.
- Store in a closed container at room temperature for up to 5 days or freeze layered between wax paper in a freezer safe container for up to 3 months.
Notes

Nutrition
Nutrition information is automatically calculated, so should only be used as an approximation.


Helen says
the next time I bake the peppermint cookies,I will start with 2 cups of flour. as I had a hard time blending the dry ingredients with the wet. and I was using a stand mixer.the taste was very good,even with a cookie scoop,it stuck to the scoop
Leslie says
Best cookie and stay fresh and moist! very addictive.! ❤️
Leslie a perry says
This is an excellent recipe and it tastes great!
I’m making these for our clients for Christmas.
The other thing is they don’t dry out they stay soft. They are very addictive! can’t go wrong with these cookies. Thanks for sharing!❤️
Gia says
A solution for the kisses keeping their shape may be to freeze the kisses for 30 minutes and then press into hot cookie.
Jodie says
I discovered these last because my son wanted to make and mint+chocolate Christmas cookie. They are my new favorite! Perfect recipe!!
Rebekah says
I doubt you will see this before I need to bake them, but what kind of cocoa is it? I normally use Dutch process for the better flavour, but I understand that it isn’t as acidic as normal cocoa. but your recipe has baking soda and no acid to react with so I’m worried the Dutch process won’t work in this.
Karlynn J says
I always use Dutch process, if it’s natural then I’ll state in the recipe! Hope this helps in time!
Glenda says
all purpose flour or self rising flour? I’m not sure what kind to use
Sharon says
Great tasting cookies but definitely need 12 minutes in the oven as the header suggests. The directions in the recipe say 8-10. My first batch came out a little underdone
Jean Davis says
mine took 8 – it depends on the oven 😉
Heidi says
These are such a winning treat for Christmastime….minty, chocolatey, a bit crunchie, a perfect cookie /candy TREAT, Mmm!! Seriously GOOD!! Thank you! (I bought a sweet little tin of them at a church Christmas Bake Sale on Sat. and discovered that a friend had made them! I had to look up the recipe online and was so excited to find your page!! These are beautiful and make a nice gift. ‘Can’t wait to try baking some (….when I drop these extra couple of pounds gained this weekend!! 🙂
Linda says
I really love these cookies! I like my kisses flattened so it spreads into each bite so after they’ve been sitting in the cookies and getting soft for about 10 mins I tap the sheet on the counter to make the kisses fall, then take a toothpick and give them 1 or 2 swirls. Thanks for the recipe looking to try them with more types of kisses.
Heaven says
Can these be made as cookie bars instead of cookies & if so hqw long to bake in an 8×8 pan?!
Shannon says
I just made these and they are amazing!!! I made half the recipe so I could make more for my boyfriend after Christmas. Thanks for sharing your recipe!!!!!
Suzanne says
These are amazing! My crew can be very critical of new cookie recipes but we all decided these are going in the family favorites column! Thank you for sharing.
Jacquelyn Von Schmittou says
What kind of brown sugar?
Shannon says
I used dark brown, but I would think you could use light brown instead if needed.
Melissa says
How many dozen does one recipe make? Thank you!
kathy says
Use should put the kisses on immediately after you take the cookies out of the oven after baking.
Karlynn Johnston says
Yup, it’s in the instructions!
Jackie says
I have just put together the dough, and it is far too sticky to roll. Any suggestions? I put dough in refrigerator to see if that helps.
Jess says
I made these for my family for Christmas this year and they were an absolute hit!!! Thank you for sharing!! We will be craving these all year now!!
Beth A says
SO GOOD! We made them today and they turned out great. I made the dough balls a little smaller and we ended up with 66, lol!
Kirsti Kreutzer says
So. Darn. Good! Thank you for sharing!
Melissa says
How do you get the kisses to not melt flat. All the kisses melted into puddles on my cookies. I even refrigerated the kisses to try to stop them from melting. They taste good they just dont look very pretty. I will make the cookies by themselves next time me cause they are really good. Maybe just rolled on powdered sugar.
Karlynn says
Hey,.you are putting them on AFTER baking, right? They won’t melt except for the bottom which makes them stick to the already baked cookie!
Zimmie l Harris says
recipes sound good and hopefully I will try soon after my knee replacement surgery on December 11 , 2018.
MY THUMB PRINT COOKIES SPREAD NO INDENT says
Please let me know how to make better thumb prints
KM says
I made these for my husband to take to work and honestly, I didn’t want to let them go. They’re amazing! Definitely will be making a batch for us to keep! This is my new favorite Christmas cookie.