This post may contain affiliate links. Please read our privacy policy for additional information.
Why You’ll Love This Recipe
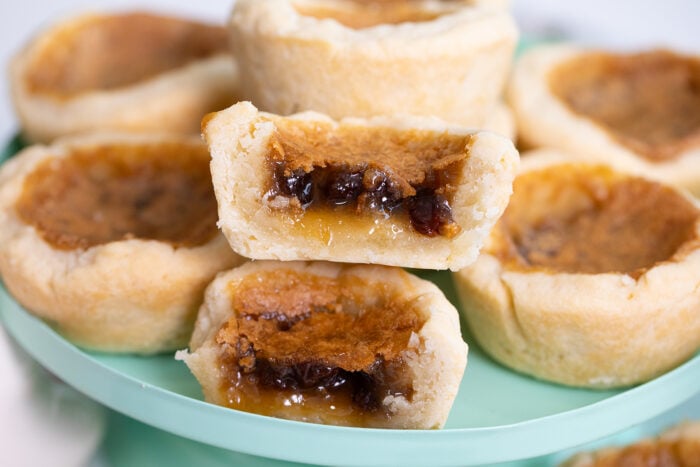
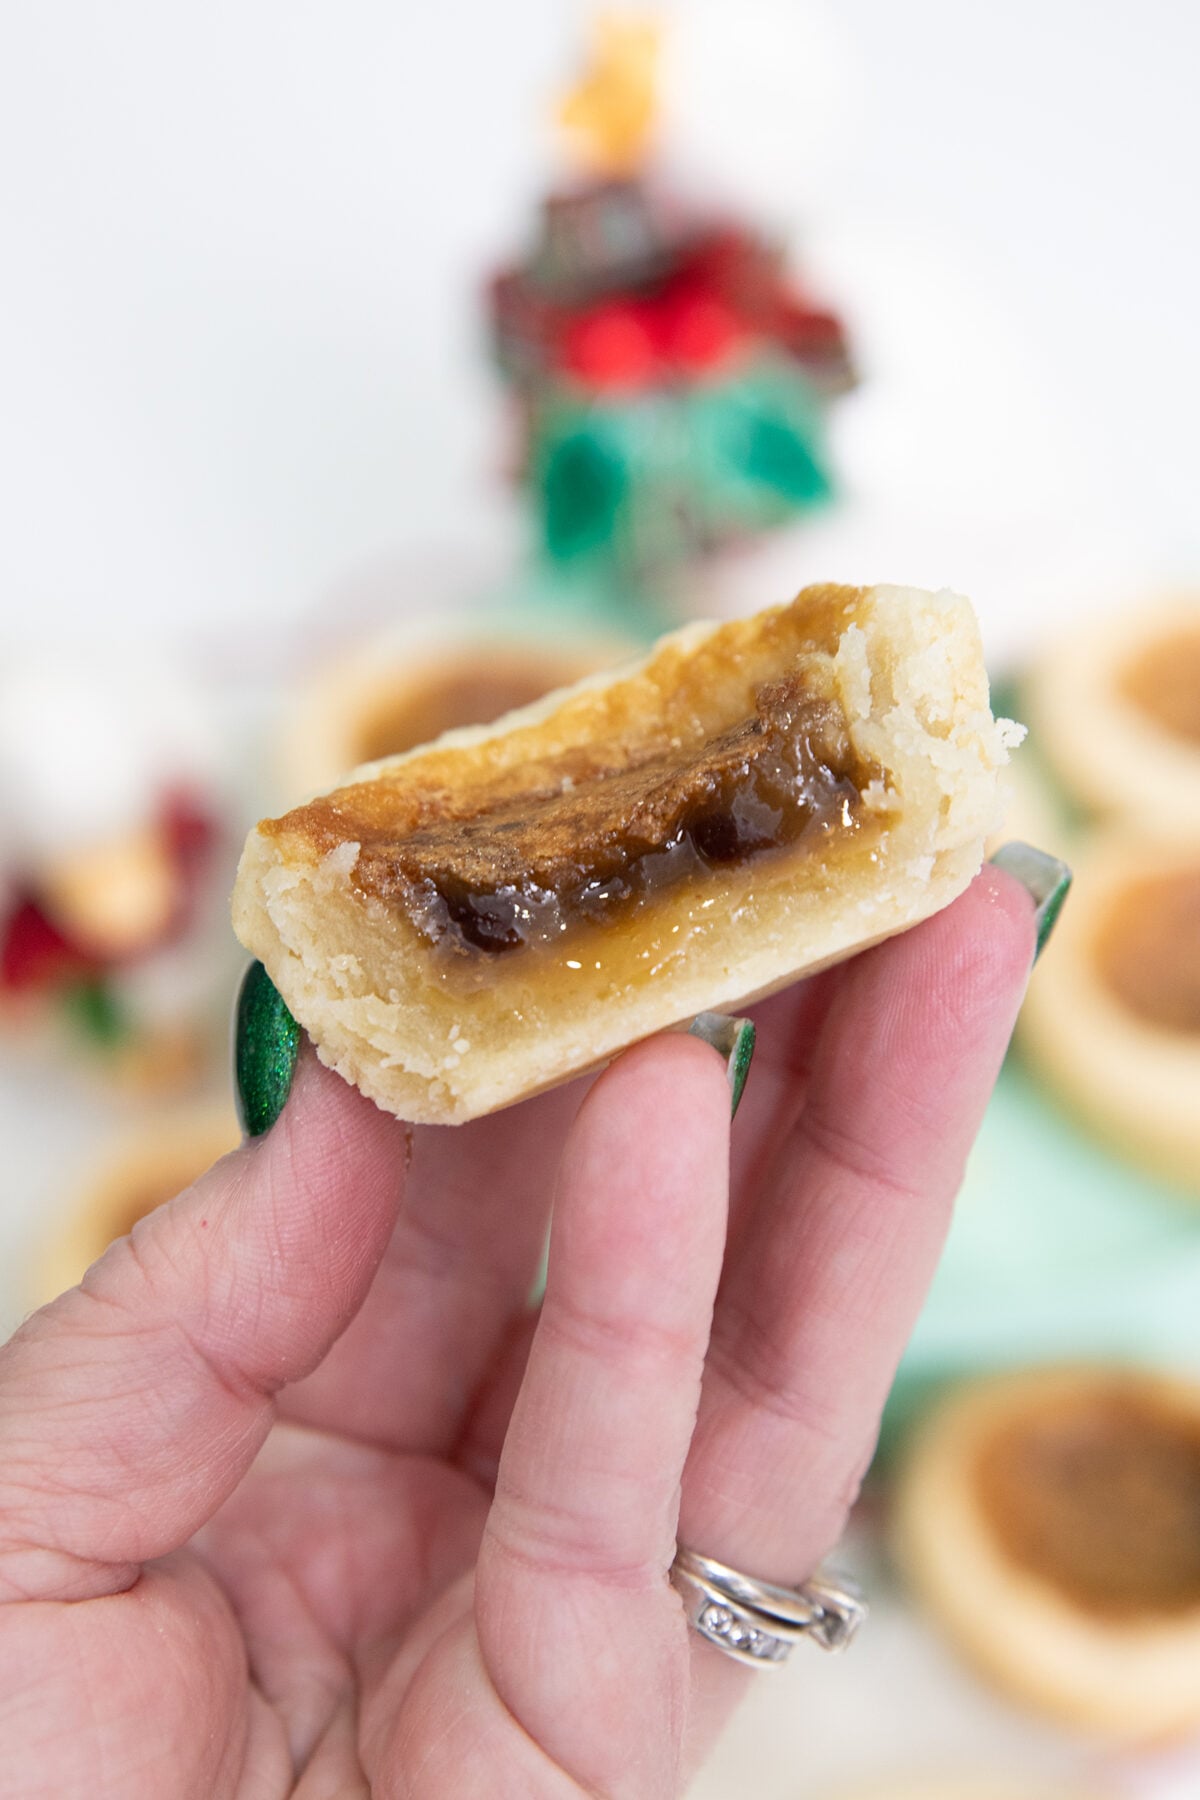
This recipe combines my Grandma’s homemade tart crust with her already famous butter tart filling to deliver the ultimate Canadian butter tart. I’ve been making butter tarts for years, and I’ve finally mastered the process!
If there is one thing I am known for when it comes to Christmas baking, it is my butter tarts. Not only are they a Canadian staple, but this is the one recipe (along with my whipped shortbread, of course!) that my family begs me to make every Christmas.
This recipe takes this up a notch and introduces my Grandma’s method of making her own tart shells by hand. Looking for a simple approach? Try my famous quick and easy butter tarts.

Karlynn’s Recipe Notes
- Skill Level: These butter tarts are for those of you who want a handmade tart dough. They are, therefore, medium difficulty when compared to using store-bought shells.
- Total Time: This is a longer recipe, as it involves making the tart shells by hand and chilling the dough for an hour. Please prepare for this to be a 2-hour process or longer.
- Variations: Looking to change things up? Why not try substituting Saskatoon berries instead of raisins in the filling to kick things up a notch?
- Tools for This Recipe: You will need large baking sheets, a food processor to make bringing this dough together easy, and mixing bowls to make this recipe!
Ingredients Notes
Tart Pastry: The homemade pastry used in this recipe is a tweaked Tenderflake Pie Crust recipe, just as my Grandma made.
Lard: This is the secret to a truly flaky buttertart pastry. Make sure it is cold when added to the flour mixture. I use Tenderflake lard here in Canada.
Salted Butter: As with most of my baking recipes, I recommend using salted butter. Salt helps to balance the sweetness of the buttertarts.
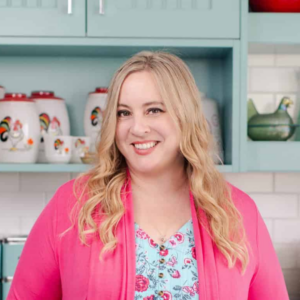
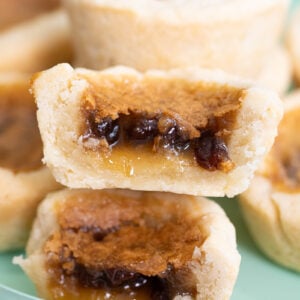
Raisins: I recommend using Thompson raisins to get the perfect balance of flavor in this recipe. Golden raisins do not taste the same. Darker raisins fit better with the butter tart filling in my opinion. Sultanas also work, but aren’t as good as Thompson.
Whipping Cream – This helps the filling to set up into a nice sauce.
No Corn Syrup Butter Tarts
I do not use corn syrup in my butter tarts. While I don’t mind using it for other desserts, I feel lilke it doesn’t belong in butter tarts and makes them too sweet.
How to Make Canadian Butter Tarts
This is a quick overview of the recipe. The full list of ingredients & complete step-by-step instructions are in the recipe card below.


- Prepare the tart shell dough and refrigerate it for at least 1 hour.
- Remove the dough once chilled and roll it out to a thickness of 1/4 inch. Using a 4-inch biscuit cutter, cut out 12 circles. You will get exactly 12.
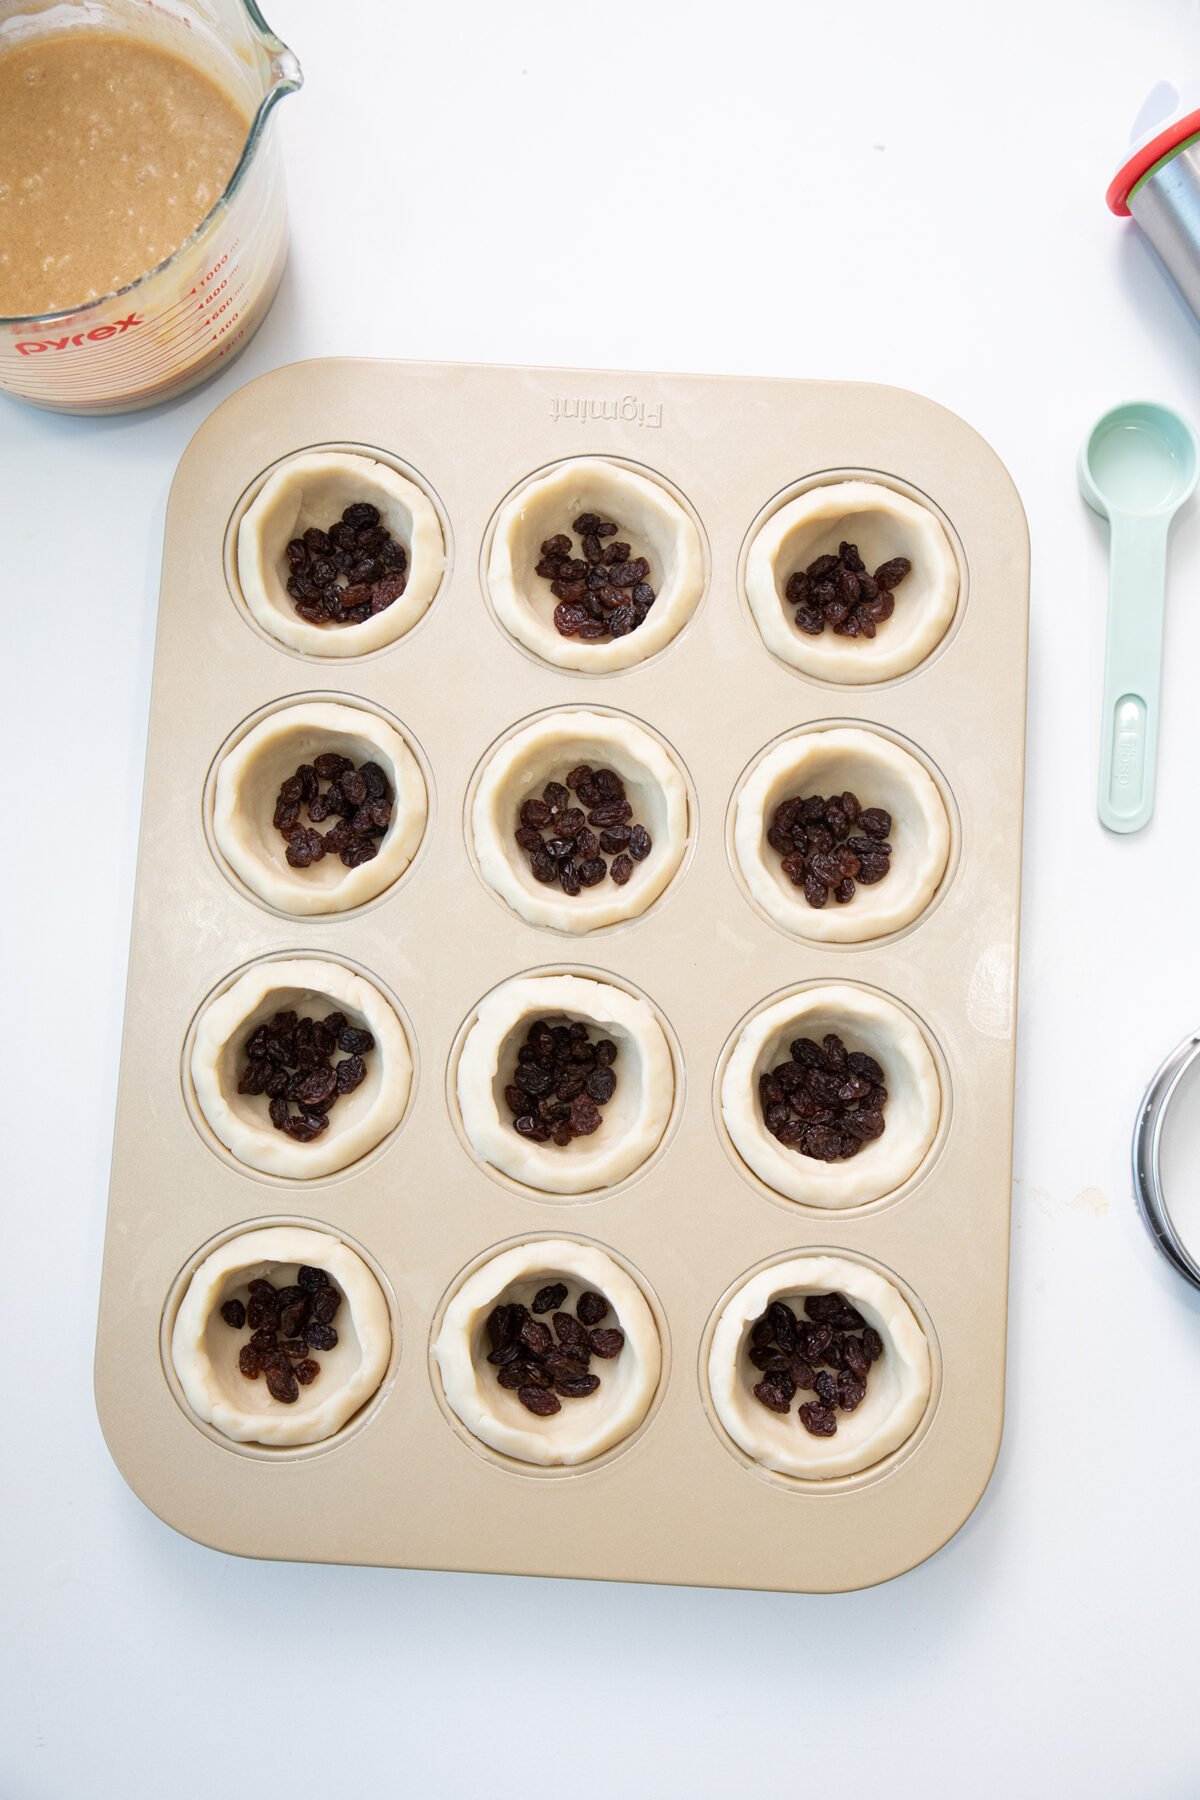
- Place each circle in the well of a muffin tin, pressing to form a shell. Refrigerate.
- While the tart shells refrigerate, prepare the butter tart filling.
- Place 1/2 a tablespoon of raisins in each tart, then fill each tart 2/3 of the way full with the filling.
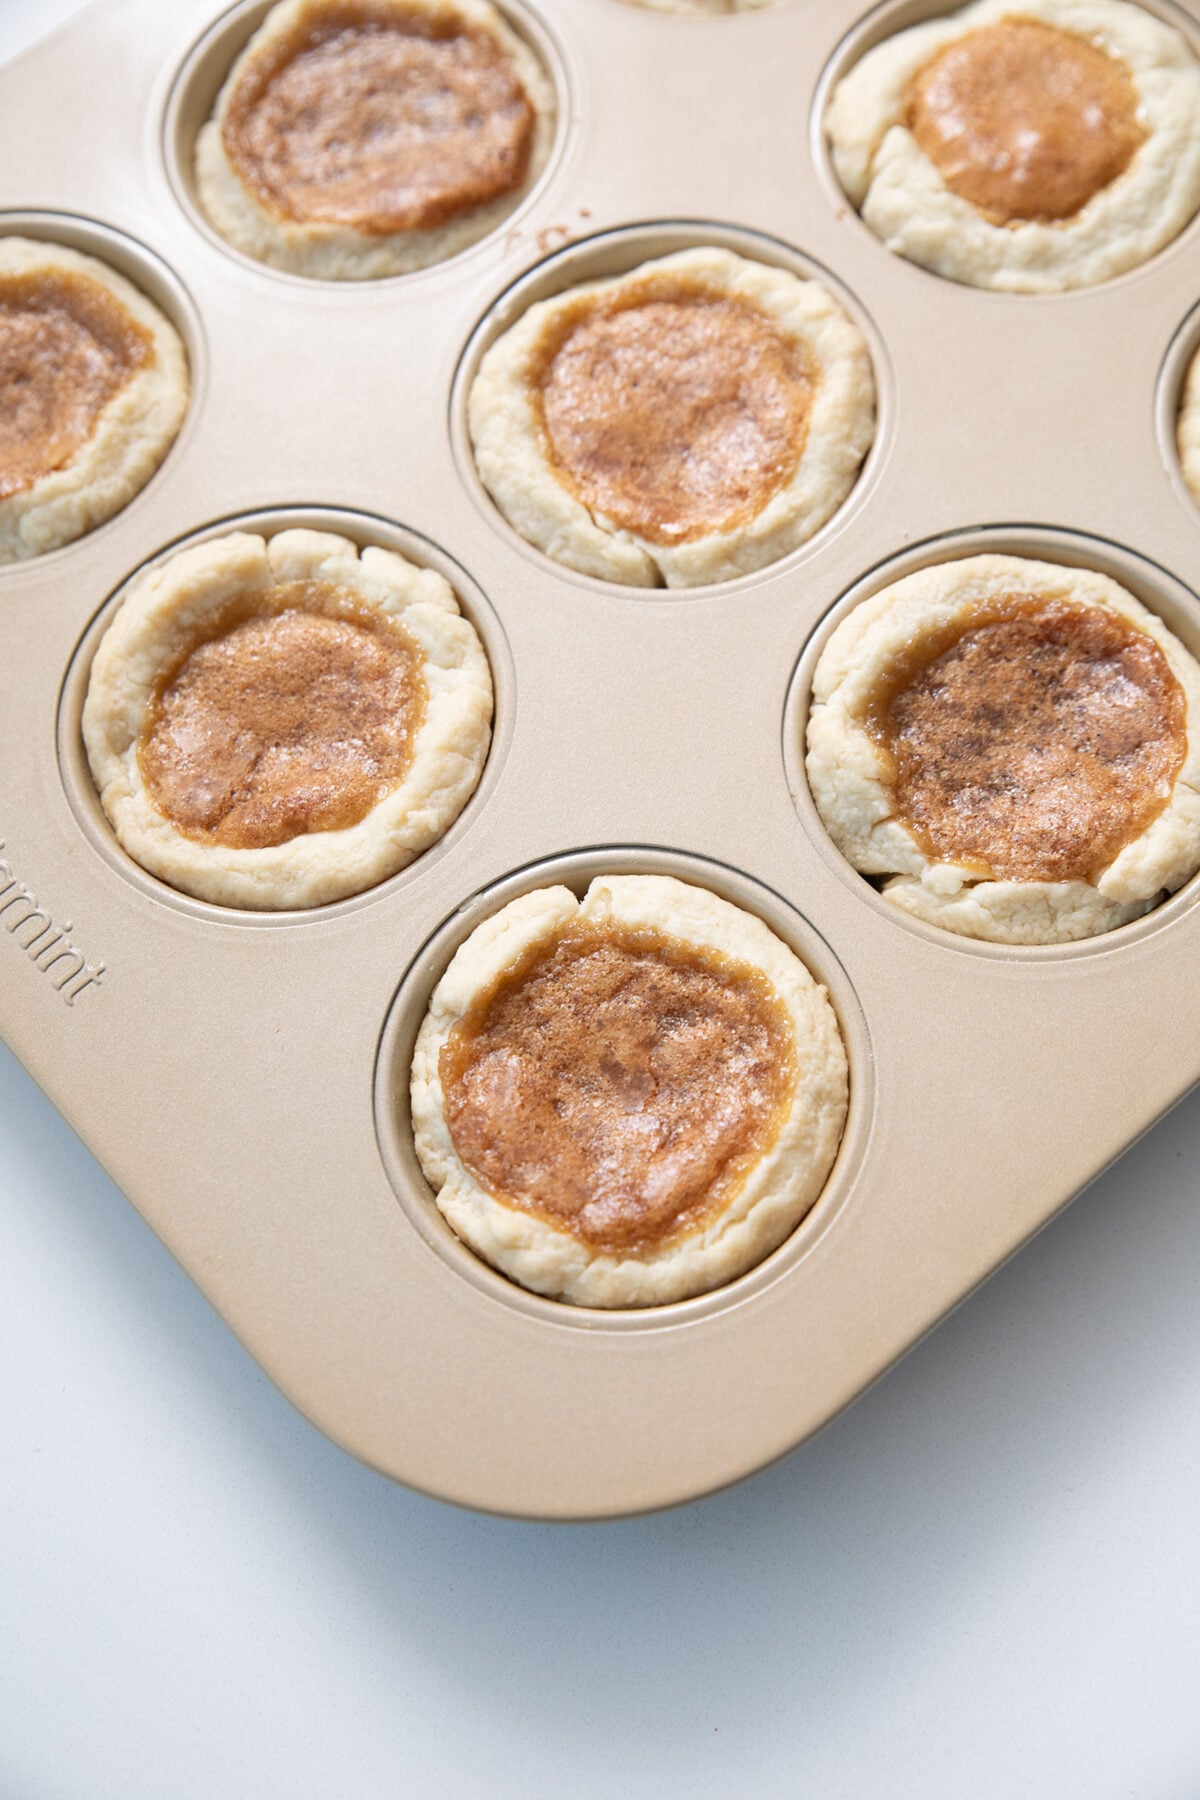
- Bake in a 375°F oven for 25 minutes, until the filling is bubbling and the tart shells re light brown.
- Remove and cool completely in the muffin tins.
Sweetened or Unsweetened Tart Shells?
I have always used unsweetened tart shells, even if they are store-bought. Butter tarts are already so sweet and rich that we prefer the tarts without sugar.
The recipe I use is a riff on the Tenderflake pie crust recipe, which has no sugar. If you want sweet pastry, add two tablespoons of granulated sugar to the flour and salt mixture.
Storage Instructions
You can store these tarts in the fridge in a sealed container for up to 5 days, or in the freezer for a few months. Layer them with sheets of wax or parchment paper to make them easier to separate and defrost later.
More Delicious Tart Recipes
Looking for more delicious tart recipes? Try my fast and easy Lemon Tarts or my Mincemeat Tarts with Butter Pastry.
Happy Baking!
Karlynn
The Best Canadian Butter Tarts
Ingredients
Butter Tart Pastry Crust
- 2 ½ cups all-purpose flour
- 1 teaspoon salt
- ½ cup butter , cold and cubed into smaller pieces
- ½ cup lard , Tenderflake, cold and cubed into smaller pieces
- 1 teaspoon vinegar
- 1 large egg yolk, lightly beaten
- ice water
Butter Tart Filling
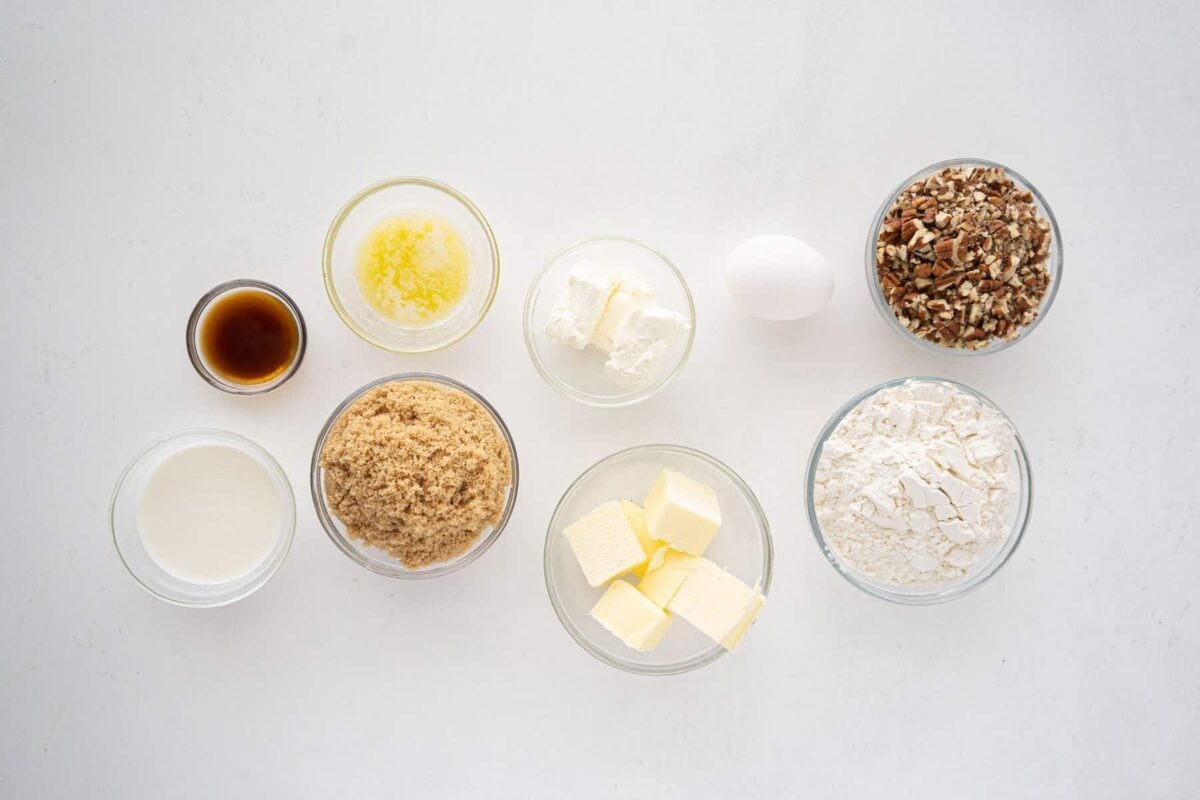
- 1 cup brown sugar , lumps broken up, packed
- ⅓ cup salted butter, melted
- 1 large egg, beaten well
- 2 tablespoons whipping cream
- 1 teaspoon vanilla
- ½ cup Thompson raisins, or currants
Instructions
How to Make the Tart Crust by Hand
- Whisk together the flour and salt in a large bowl.
- Cut in the butter and the Tenderflake with pastry blender or 2 knives until the lard is pea sized within the flour.
- In a 1-cup liquid measuring cup, combine the vinegar and the egg yolk. Add the ice water to make ½ cup of water.
- Gradually stir the liquid into the flour mixture, adding only enough liquid to form a cohesive dough. You may not need to use all of the liquid. If you need to add more, flick the ice water onto the dough using your fingers, a little at a time, until the dough comes together.
- Gently gather the dough into a ball and flatten it into a disk. Then, wrap it in plastic wrap and refrigerate for an hour if you plan to use it right away, or freeze it for future use.
How to Make the Tart Crust With a Food Processor
- Add the flour and salt to a medium to large-capacity food processor fitted with the metal blade. Pulse for 3-4 seconds to combine.
- Add in the cold butter and lard cubes. Process for a few seconds at a time until you have pea-size clumps of the butter and lard in the flour mixture.
- In a 1-cup liquid measuring cup, combine the vinegar and the egg yolk. Add the ice water to make ½ cup of water.
- Add some of the cold water mixture slowly into the flour mixture, then process for a few seconds. Add just enough more liquid and process until the flour mixture is just clumpy and starts to cling together in clumps. You may not end up using all of the liquid.
- Gently gather the dough into a ball and flatten it into a disk. Then, wrap it in plastic wrap and refrigerate for an hour if you plan to use it right away, or freeze it for future use.
Prepare the Tart Shells
- When you are ready to use the dough and it has chilled, roll out each portion one at a time on a lightly floured surface. Roll the dough to a thickness of ¼ inch. You will get exactly 12 tart shells.
- Using a 4-inch biscuit cutter, cut the dough into circles, then place each circle into a muffin well. Gently push the dough into the muffin well, forming a tart. The top of the tart should be slightly above the muffin well, which helps to prevent the tart from spilling over.
- Place the muffin tins into the refrigerator while you make the filling.
Prepare the Filling
- In a large bowl or a 10-cup capacity liquid measuring cup, combine the brown sugar, melted butter, beaten eggs, cream, and vanilla until you have a smooth mixture.
Bake the Butter Tarts
- Preheat the oven to 375°F (190°C) and set an oven rack in the middle position.
- Remove the chilled tart shells. Place half a tablespoon of raisins into the bottom of each tart. See my notes below for raisins.
- Fill the tart ⅔ of the way to the top of the tart shell with the liquid filling mixture.
- Repeat this process with all the remaining tarts.
- Bake in the oven for 20-22 minutes, until the edges of the tart shells are golden brown and the filling has started to firm up and set.
- Remove the tarts from the oven and cool them on a wire rack for a few minutes. Then, run a butter knife around the edge of each tart to loosen it. Let the tarts cool completely in the pan, then remove them from the muffin wells.
- If the tarts are sticking in the tin, run a knife around the edges again and refrigerate to cool it more, then remove.
- Once cooled, store them in an airtight container, separating layers with parchment paper for up to three days at room temperature. You can also freeze them after storing them in the same manner.
Notes
Nutrition
Nutrition information is automatically calculated, so should only be used as an approximation.


Pat says
I absolutely agree that these are the best butter tarts! I have made these a number of times and every time I receive numerous compliments. And yes…raisins make them perfect!
Lynda says
what can I use instead of raisins or currants?
Thank
Andrea says
You can use chopped pecans or leave them plain.
Betty Davis says
looks very good
Brendie Eastrich says
I have been making these tarts since I was a little girl with my Mom & Aunt & with my daughters & grandkids. Everyone loves them so much!!!
Cissy says
Hi there,
My filling keeps overflowing in the oven no matter how much I even reduced it.
What could be going wrong?
Thanks!