This post may contain affiliate links. Please read our privacy policy for additional information.
There is one job that I happily hand over to Mr. Kitchen Magpie when it comes to holiday baking: the yearly making of mincemeat tarts. I learned early in our marriage that he has a deep abiding love for mincemeat tarts that stems from one of his fondest childhood memories. He has mastered making mincemeat tarts with butter pastry (a super easy recipe) and is sharing it today with all of you.
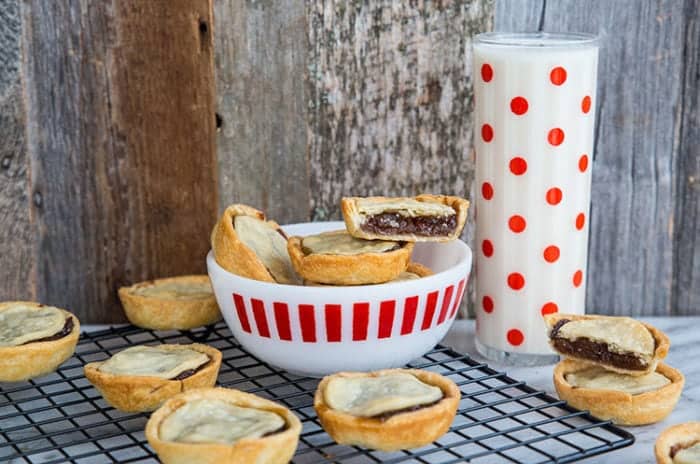
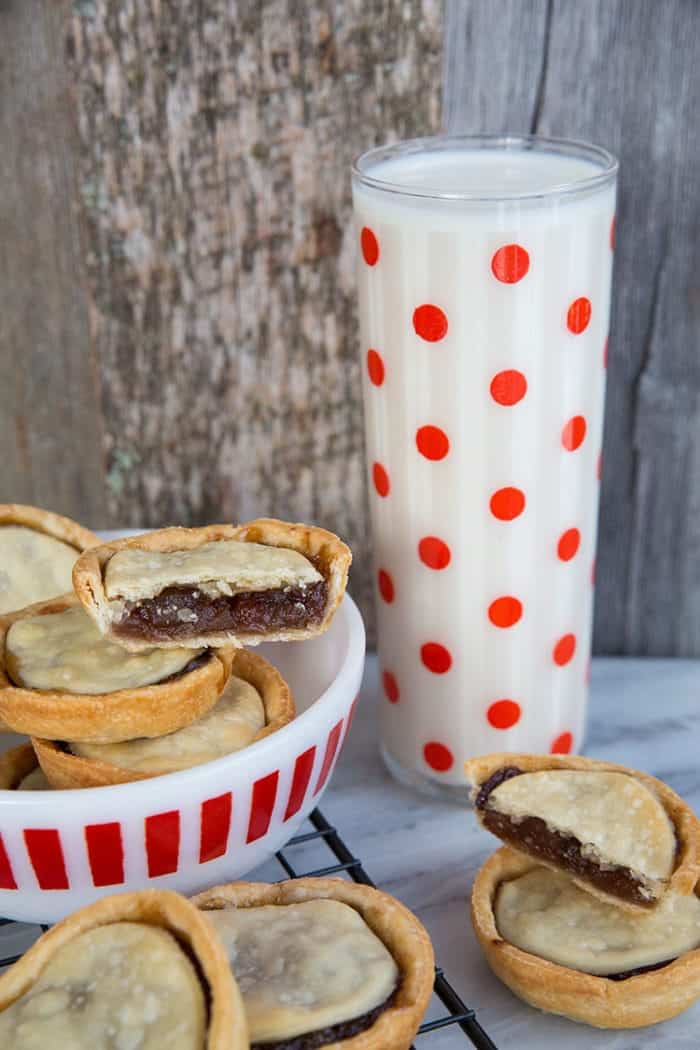
Mincemeat Tarts with Butter Pastry, a Christmas classic!
“Every year at Christmas my mom would make 2-3 dozen minced meat tarts and put them in old cookie tins in the fridge. It was always a race between my dad and I to get our own tin to hoard and eat over the holidays. We would sit there with our stolen tins watching TV with a huge glass of milk to wash it down.
I can still see my Dad sitting in his recliner with his tarts. To this day, when minced meat tarts are made, I am very particular about how they look and are made, so I take over the making of tarts from Karlynn. There must be a small round top on the tart and they must be cold (mainly because when the tarts are fresh they fall apart, and I can’t cram the whole tart in my mouth). I basically live on these tarts for a few days until they are gone, then wait until Christmas rolls around next year!” Mike
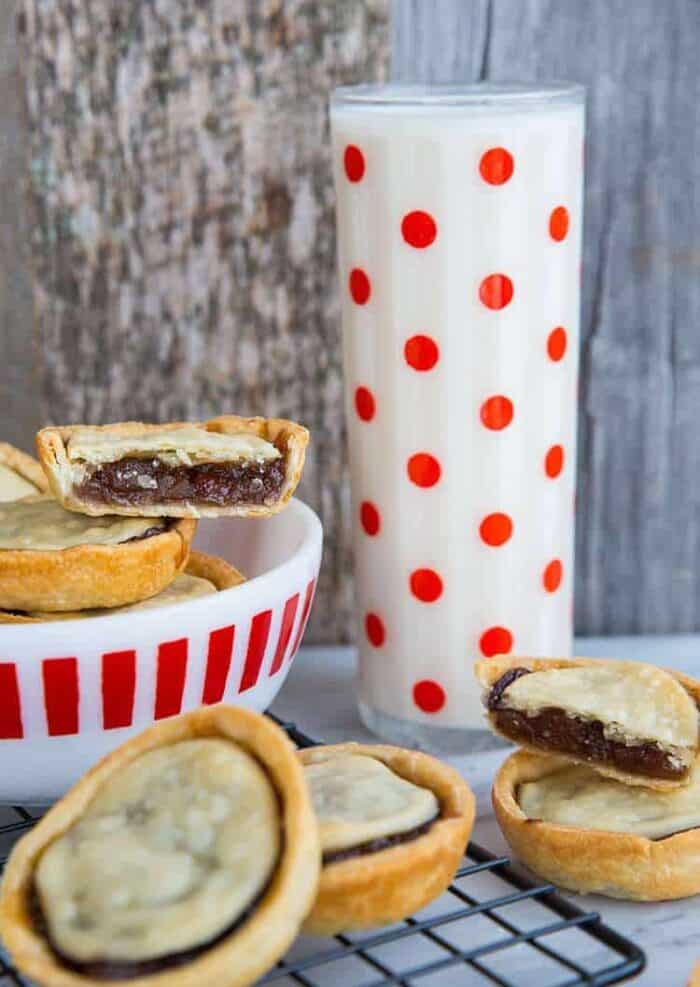
So now mincemeat tarts and a glass of milk are a family tradition in our house for the holidays. I always have milk in my fridge, but during the holiday season I make sure to stock up with extra cartons. We usually have out of town company over on weekends – with kids that love their bowls of cereal & milk in the morning – and I make sure that at all times I have milk on hand.
And my Christmas baking? Holy Dinah, I can’t even guess how much milk I go through! We are truly lucky here in Canada to have delicious & refreshing Canadian quality milk that is part of our holiday season, whether it’s a cold glass of milk with dinner or milk as a staple used in our baking.
My love of milk during the holidays goes along perfectly with the most adorable Christmas video I have seen this year from the Dairy Farmers of Canada! My daughter and I are in love with the adorable little reindeer in it – try to watch the video full screen so you can see him properly!
You can also visit Dairy Farmers of Canada’s YouTube page to learn more about their commitment to making milk delicious and refreshing and for more ideas on incorporating milk into your holidays!
So, how is everyone doing with their Christmas baking so far? I always think that I am getting ahead of the game, but end up panicking at the last minute of course. What is going to be on your dessert trays this year?
Happy Baking everyone! Hope you enjoy Mr. Magpie’s recipe!
Love,
Karlynn and Mike

Mincemeat Tarts with Butter Pastry
Ingredients
- Simple Butter Pastry
- 2 ½ cups all-purpose flour
- ½ teaspoon salt
- 1 cup butter, frozen
- 1 cup ice water
- 1 jar of your favourite mincemeat filling
Instructions
- Whisk together the flour and salt in a large bowl. Using a cheese grater, grate the frozen butter into the flour mixture. Mix in until the butter is coarse crumbs.
- Make a well in the centre of the dry ingredients. Add the iced water 1-2 tablespoons at a time to the centre, using a fork to toss the flour instead of mixing. Add enough water that the dough comes together. Form the dough into two disks. Wrap in plastic wrap and refrigerate for 2-3 hours.
- Pre-heat your oven to 400°F.
- To make the tarts, roll out the dough until it’s ¼ inch thick. Using a 2- inch biscuit cutter, cut out circles. Using a 1-inch biscuit cutter, cut out matching circles for the tart tops.
- Place circles into greased muffin tins, forming tart shells. Fill with filling then place a smaller circle on top.
- Bake in the oven for 14-16 minutes until the pastry is golden brown. Remove and cool.
- Yield 3-4 dozen tarts
Notes
Nutrition
Nutrition information is automatically calculated, so should only be used as an approximation.

Pin this to your Christmas Baking Board & REMEMBER TO FOLLOW ME ON PINTEREST!


Sunflower says
Mincemeat pies (as my British mum used to call them) bring back beautiful memories of my mother Christmas baking with my brother and I hovering over the racks of cooling pastries. Happily for my brother, I was more fond of the jam tarts than the mincemeat pies and I have images of him opening those cookie tins and gobbling down those pies with a glass of cold milk standing by. Your memories brought back so many memories of my own and now I have this delightful recipe that makes my kitchen smell just like hers did when I was a kid. Thank you for this treasure.
Lorraine says
I’m confused…how does a 2 inch round cover the bottom and sides of tart tin?
Karen says
Also, I have a regular muffin tin and I got 12 in. But I had to take the 2 inch circle and flatten it out and still barely covered half of it. There’s no way I would get two or three dozen out of this.
Carole says
The pastry for these tarts is delicious!
I used a muffin tin instead of a tart tin so my tarts were big with lots of mince meat in them, but the pastry held up beautifully. Great recipe! Thanks.cheets, CAM
Lisa Huff says
Sounds delicious!