
This post may contain affiliate links. Please read our privacy policy for additional information.
How To Make A Perfect Whipped Cream
Whipped cream is one of the most versatile toppings you can make at home, but it is somehow almost impossible to make right.
What’s worse is when you manage to figure it out and make it right finally, you can never repeat your success. Why is making whipped cream so hard, and why is it so hard to replicate every time? Read on to find out how to nail it regularly.
For more specially flavored whipped cream recipes, why not try this Strawberry Whipped Cream or this Lemon Whipped Cream? If you’re looking for something to use this whipped cream on, why not make my English Christmas Trifle?
What Is Whipped Cream?
Everyone can identify whipped cream by sight, but what actually is it? Without understanding what whipped cream is in its entirety, you will probably struggle to make it yourself.
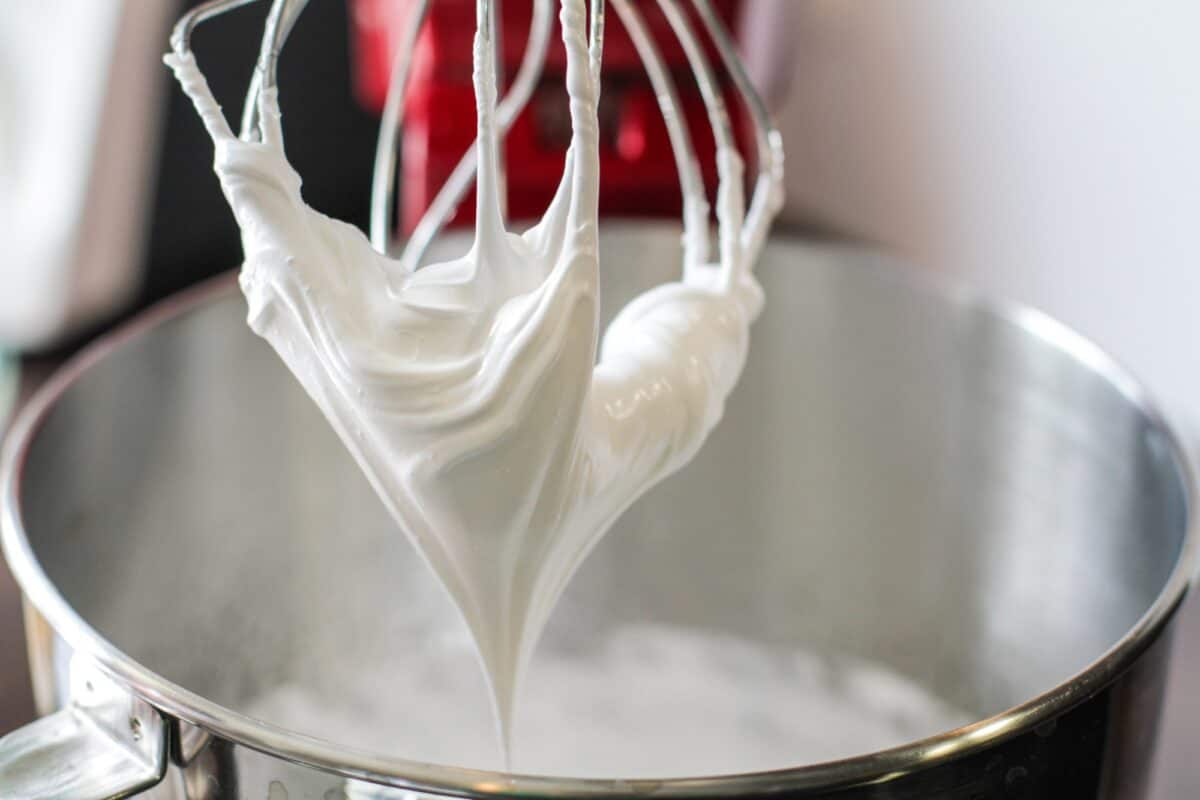
Whipped cream is basically just cream that has been whipped using a whisk or an electric mixer so that air is forced into the cream and the volume of the cream increases.
This process of forcing air into the cream turns it into something called a “colloid,” which is a term for when another substance, like air or other liquids, is held in dispersed solution within a liquid. With whipped cream, you are forcing air into the cream at high speeds, trapping the air in-between the fat molecules to increase its total volume and give it a silky mouthfeel.
With this in mind, we can make sure to follow a few key steps to make great whipped cream every time.
The Key Steps – Start Cold & Avoid Over Whipping
Making your own whipped cream at home can become incredibly simple, so long as you remember a few key steps.
- For starters, you need to make sure your ingredients are as cold as they can possibly be. The whipping process heats up the cream, making it gradually more difficult to hold its shape or allow air to fold into the fat particles of the cream.
So keep your cream in the fridge right up until you want to use it, as this will stop it from overheating and separating. - The other main tip is to make sure that you avoid over whipping your cream at all costs. While most supermarkets’ whipped creams seem to be whipped to incredibly stiff peaks, the best whipped creams are made with only a very light stiffness.
If you plan on using it as a piped topping, like, for instance, decorating a cake, then you definitely want to stop before the cream gets too stiff, as the process of squeezing it through a tube will continue to stiffen it.
Now that we know the few key elements of making it great, here’s a step-by-step guide for making the best whipped cream every single time.
Step 1: Get Your Gear
To make whipped cream, you’ll need either a whisk, electric mixer, or a stand mixer with a whisk attachment, as well as a bowl deep enough for all of the cream. The cream will roughly double in volume when whisking, so make sure you pick one big enough.
If you live somewhere warm or just want to make sure everything goes perfectly, stick your equipment in the freezer for 15 minutes before whipping to help keep everything cold.
Step 2: Start Whipping
Add your cream to the bowl and, with your mixer set on medium speed, begin whipping the cream as evenly as possible. If you are using a stand mixer, you can just let it whip on its own, but if you are using an electric mixer or a hand whisk, try and rotate the bowl as you whip to ensure you are evenly dispersing the air.
Step 3: Add Your Flavorings Once It Starts Thickening
Watch your cream carefully and wait until it begins to thicken slightly; you should see the very first hints of the formation of soft peaks. It will look a bit like streaks in the ocean over the surface of your cream.
Once you reach this point, add in your flavorings of choice. A small amount of sugar and some vanilla extract is a great mainstay.
Depending on how sweet you like it, go up to a tablespoon of sugar per cup of cream and about a ½ of a teaspoon of vanilla extract.
Once your flavorings are all added, reduce the speed down to low and watch your cream super carefully.
Step 4: Stop Once Soft Peaks Form
The very moment you begin to see soft peaks form, stop your mixer and spoon it over whatever you like.
You have to stop just as it starts to form peaks because if you take it even a few seconds too long, you will end up with over whipped cream that falls apart within minutes.
Making Stabilized Whipped Cream
If you are making this at home, most of the time, you just want it to spoon over some dessert and therefore use it immediately.
However, what do you do if you want to keep it stable for more than an hour when doing something like decorating a cake or a pie?
To keep it stable, add in some cooled gelatin mixture when you add in the sugar.
Per cup of heavy cream, mix together one teaspoon of unflavored gelatin in four teaspoons of water and bring to a boil. Once it reaches boiling, turn it off and cool completely before using it.
Adding this cooled gelatin mixture into your cream with the sugar helps to keep it firm and stabilized and will stop it from falling apart for up to a week if kept in the fridge!
Need more how-tos? Check out our Kitchen School section.


Leave a Comment or Recipe Tip