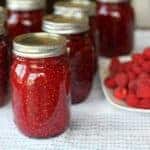
Homemade Raspberry Jam Using Honey
This easy but delicious raspberry jam recipe is easy to customize to your liking. What it lower in sugar? Use honey. Want to use white sugar? Go ahead! No matter what you use this raspberry jam turns out great every time!
Servings: 4
Calories: 130kcal
Ingredients
- 2 cups of crushed raspberries
- 2 cups of crushed raspberries with seeds removed
- 1 cup of unsweetened apple juice
- 49 grams pkg Bernadin No-Sugar Needed Fruit Pectin
- 1 to 3 cups of granulated sugar OR up to one cup honey base this on taste test
- this will yield 4-6 250ml jars of jam, depending on how much sweetener you add.
- Do NOT double this recipe!
Instructions
- Place your clean mason jars (keep the lids aside) on your canner rack in your canning pot. Cover the jars with water, and heat to a boil. Heat the lids in hot (not boiling!) water to sterilize. Keep both the jars and lids hot until ready to use.
- Crush the raspberries one layer at a time. To remove the seeds, press the raspberries through a sieve and proceeded to measure two cups after the seeds are removed. Place the 4 cups of raspberries in a large pot and whisk in the No Sugar Needed Fruit Pectin until dissolved.
- Bring the mixture to a boil, stirring constantly. Stir in your sweetener of choice and bring to a boil again.
- Bring to a boil again for three minutes, stirring every now and then to make sure it's not burning. When done, skim off any foam that may be on the top.
- Remove your jars from the heat source and ready them to be filled.
- Quickly ladle the jam into the hot jars, filling to within ¼ inch (0.5 cm) of the top of jar which is called the headspace.
- Remove any air bubbles using a non-metallic utensil and then refill to ensure the proper headspace if needed.
- Wipe the jar rims removing any jam residue; this is very important or the jars will not seal!
- Screw the jar band down tightly until you start to feel resistance, then screw the jar shut using your fingertip strength. Basically this means do not tighten them using your entire strength!
- Place each jar in the canner rack and make sure they are covered with water at least once centimetre deep.
- ***Water-bath canning processing guidelines***
- Usually recipes are written for water bath canning at altitudes less than 1000 feet. If you reside at an altitude higher than 1,000 feet above sea level, follow these guidelines:
- For processing times of less than 20 minutes: Add 1 additional minute for each additional 1000 feet of altitude.
- For processing times of more than 20 minutes: Add 2 additional minutes for each 1000 feet of altitude.***
- Remove the jars from the canner without tilting.
- Cool upright, undisturbed for 24 hours; and do not retighten the screw bands, no matter how much you want to!
- When they are cooled, check the jar seals; the lids will be popped inwards. If you push on the top, it will not click or make a noise because the pressure has sucked the lid in.
- Label your gorgeous goods and store jars in a cool dark place!
- You are ready for a taste of summer during the winter months!
Notes
BEFORE YOU CAN ANYTHING, read up on canning safety. My canning recipes are for me and my family alone and YOU ALONE are responsible for you own canning process, food, cleaning and safety.https://www.foodsafety.gov/blog/home_canning.htmlhttps://nchfp.uga.edu/publications/publications_usda.html
Nutrition
Calories: 130kcal | Carbohydrates: 32g | Protein: 1g | Sodium: 28mg | Potassium: 243mg | Fiber: 8g | Sugar: 11g | Vitamin A: 40IU | Vitamin C: 32mg | Calcium: 35mg | Iron: 1.2mg