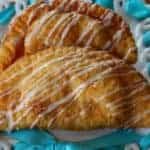
Apricot & Marmalade Fried Pies
How to make Apricot & Marmalade Fried Pies straight from Nana Bread's Texas kitchen!
Servings: 12
Calories: 65kcal
Ingredients
- 2 cups dried apricots
- 1 cup water
- 2 tablespoons apricot brandy optional
- 1 cup orange peach & cherry marmalade (or whatever comes closest at your grocer)
- pastry recipe
Instructions
- In a saucepan, simmer the dried apricots, water and brandy (optional) until the apricots are tender but not mushy; drain thoroughly and allow them to cool completely. Once cooled, chop the apricots into ¼” (roughly 6.5 mm) and toss them into a mixing bowl. Add the marmalade and set it aside.
- Remove the chilled pie dough from the refrigerator and roll it on a lightly floured surface to about 1/8” (or approximately 3mm) thick, as you would for any other pie. Now you’ll need to decide how large you want your fried pies to be.
- A perfect dessert size would be about a circle about the size of a salad plate. To make fried pies this size, simply lay a salad plate, saucer or bowl on your rolled dough and use a sharp paring knife to cut out circles of dough.
- A more petite snack size would be a circle about 3” in diameter. For this, I have a metal biscuit cutter I use. If you don’t have a biscuit cutter, save a metal vegetable or bean can the next time you empty one. Just remove both ends of the can once it’s empty, remove the label and wash thoroughly. I keep a few of these in my utensil drawer – from small tomato paste cans to larger vegetable cans. They make great biscuit & cookie cutters, and when they wear out, you can toss them and make another.
- If you’re really feeling frisky, you can cut your dough into squares which will make nice triangle fried pies when they’re finished. I like a nice triangle-shaped fried pie when I want to kick it “old school” like my Texas grandmothers did. A 6” square is a good starting point.
- Once your dough is cut into shapes, spoon enough filling into the center leaving approximately ¾” to 1” of an edge so you can properly seal your fried pies. Dipping a pastry brush or your finger in water, wet the edges of the pie dough so they will stick together, and fold the dough in half, pressing the edges firmly to seal. Once all my fried pies are shaped and sealed, I like to use a fork to crimp the edges, just to make sure nothing bursts open when they’re fried. If your fork sticks to the dough, run your fork through a little flour occasionally.
- When all of your pies are shaped, sealed and crimped, allow them to sit for about 5-10 minutes before frying. This allows them to really seal well and settle before they take a hot bath.
- While your pies are resting, heat 1½” to 2” of canola oil in a deep heavy-bottomed pan. If you’re using a thermometer, you want it to be around 350F or 175C. Carefully slide one or two pies into the hot oil, turning them once, until each side is a gorgeous golden brown. Remove and drain on paper towels as you go.
- To finish, dust with powdered sugar or create a simple glaze of powdered (confectioner’s) sugar, ¼ teaspoon of vanilla or almond extract and just enough milk or water to create a pourable glaze. I prefer the glazing method, and I like to put mine into a plastic zip-top bag, then snip off a corner of the bag with scissors and drizzle a nice zigzap pattern across the top. If you don’t feel that fancy, you can simply spoon the glaze over the top.
Nutrition
Calories: 65kcal | Carbohydrates: 15g | Sodium: 3mg | Potassium: 278mg | Fiber: 1g | Sugar: 12g | Vitamin A: 815IU | Vitamin C: 8.2mg | Calcium: 18mg | Iron: 0.6mg