This post may contain affiliate links. See my privacy policy for details.
Today’s pie post is brought to you by the letter F, the color red and a computer meltdown.
Just think on that sentence for a while. You’ll get it.
While typing out the latest Culinary Cook Off post, announcing the awesome fact that we are raffling off the 4th judges position, my computer, without warning, literally died on the table. No amount of thumping, cursing, button pushing or electric paddles could bring it back to life.
My husband assures me that by tomorrow night we’ll have all the data off of it. My pictures (thousands), my documents for the Cook Off (important) and my emails. (makes me weep just thinking about them). But for now, I am typing away on his Mac, very grudgingly, and only because I have to get my PieDay post out.
The lucky parents at last week’s Culinary Cook Off meeting got to taste not one, but two different pies at the meeting. What better place to get rid of my pies, on completely willing tasters.
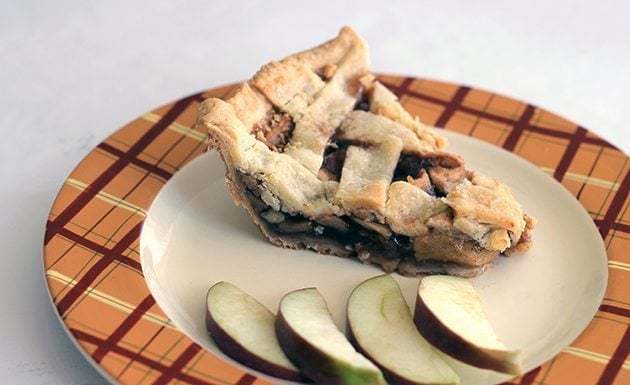
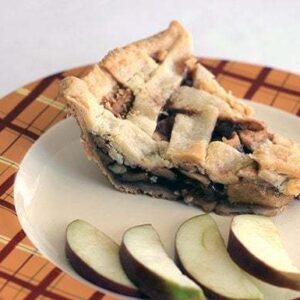
The one that I enjoyed the best was my apple pie, because nothing beats apple pie. Actually, let me rephrase that, nothing beats a great apple pie.
In my books, great apple pie is bursting with cinnamon, the apples are cooked properly, a hint of vanilla needs to be found in there somewhere -which most recipes actually don’t include, but we always match it with vanilla ice cream, so why not in the pie too?- and sweet. Sweet as pie.
So this one is aptly named Sweet Apple Pie and if you’re a smart cookie, you’ll realize that one day soon, a more tart apple pie will be on its way.
I tried out McIntosh apples this last pie and was incredibly pleased with the results. Because they are a naturally sweet apple and not the usual pie fare, you are able to cut the white sugar by quite a bit compared to a lot of recipes and use brown sugar. My apples pies have to have brown sugar in them, it adds that caramel quality that I love so much.
Again, this is a large pie plate recipe. I have 9.5 inch pie plates that I use.
Filling:
9-10 McIntosh apples
1/2 cup white sugar
1/4 cup brown sugar
1/4 cup brown sugar rubbed with 1/4 tsp vanilla
2 1/2 tbsp cornstarch
1/2 tbsp cinnamon
1/8 tsp ground nutmeg
1 tsp lemon juice
1/8 tsp salt
3 tbsp butter, softened
One 9.5 -10 inch pie crust recipe, top and bottom
Prepare your pie crust then refrigerate until needed.
Peel, core and slice your apples to about 1/4 -1/3 of an inch thickness, sprinkle the lemon juice over them and set aside in a large bowl.
For the brown sugar that I mentioned needed vanilla rubbed in it, you take the 1/4 cup, pour the vanilla onto the middle of the sugar then rub the sugar and vanilla between your palms until the vanilla is mixed through. This is the only way you are going to get that vanilla through the recipe, there is no real liquid to combine it with. It worked perfectly to get the flavor throughout the pie Once that is done, combine the sugars, cornstarch, cinnamon, nutmeg and salt in a smaller bowl.
Toss the apples with your sugar mix until all the apples are coated nicely.
Take out your pie crust and pour the apple filling into the pan, there should be enough apples that there is a hill in the middle of the pie, thus why we need 9-10 apples for a larger pie pan. Dot the butter all over the top of the pie.
Place your pie crust on top, I did a lattice top which is my favorite way when working with a lot of fruit that needs baking through and through. It also helps to dry out fillings, so beware of this fact. It’s great when working with big, grocery store blueberries that seem to be mostly water, but can dry out a pie filling that you really didn’t want to.
Find your magic pie shelf in your oven, I’ve lectured about this before. It will be in the bottom third of the oven and all ovens are different, so this is something you have to figure out. Cover the pie with tinfoil lightly – as in just set it on top gently- and bake in that magic bottom third at 425 degrees for 10 minutes. This is going to heat up the filling and get things going, but as we all know, the crust is going to start baking far too fast, this why we need to cover it up with tinfoil. Reduce the oven heat to 350°F , remove the tinfoil (but I always cover the edges of the pie) and then bake for another 55-60 minutes until bottom is deep golden brown and the apple filling is bubbling and thickened. Let cool on a rack and resist snacking!
My honey bunny and I are heading out to Zinc restaurant at the Alberta Art Gallery on Saturday for our “first date” anniversary and I can’t wait.I haven’t had the pleasure yet, it’s on my list of “to try’s” and I love knocking one place off that list.
We celebrate February 11th instead of Valentines Day, which always works out so much better for us. I’m a Valentine’s Day Grinch, I guess, if you’re not giving me flowers the rest of the year, why bother on one commercial day that forces you to? I deserve a good 300 days of being spoiled because I’m awesome. The rest of those days, well, I’ll give you 65 days a year when I don’t deserve more than a kick in the…
Ahem. You can just guess.
That said, I look forward to February 11th like most people look forward to their anniversary. Mainly because we usually forget our actual wedding anniversary and if you think I’m joking, I’m completely serious. We’ve started the month of August only to realize that somehow our anniversary on July 29th passed without fanfare or recollection at all. I can truly say we never forget February 11th, thanks to good ol’ commercial Valentine’s Day reminding us.
Enjoy the recipe, enjoy your weekend and send my poor broken computer some good vibes. You can also try my apple pie cinnamon buns if you’re wanting another treat!
Love,
13 First Dates Later & I Still Think He’s Awfully Cute Magpie
Sweet Apple Pie
- Prep Time
- 10 minutes
- Cook Time
- 1 hour 10 minutes
- Total Time
- 1 hour 20 minutes
- Course
- Dessert
- Cuisine
- American
- Servings
- 6
- Calories
- 344
- Author
- Karlynn Johnston
Ingredients
- 9-10 McIntosh apples
- 1/2 cup white sugar
- 1/4 cup brown sugar
- 1/4 cup brown sugar rubbed with 1/4 tsp vanilla
- 2 1/2 tablespoons cornstarch
- 1/2 tablespoon cinnamon
- 1/8 tsp ground nutmeg
- 1 teaspoon lemon juice
- 1/8 teaspoon salt
- 3 tablespoon butter softened
- One 9.5 -10 inch pie crust recipe top and bottom
Instructions
- Prepare your pie crust then refrigerate until needed.
- Peel, core and slice your apples to about 1/4 -1/3 of an inch thickness, sprinkle the lemon juice over them and set aside in a large bowl.
- For the brown sugar that I mentioned needed vanilla rubbed in it, you take the 1/4 cup, pour the vanilla onto the middle of the sugar then rub the sugar and vanilla between your palms until the vanilla is mixed through.
- Once that is done, combine the sugars, cornstarch, cinnamon, nutmeg and salt in a smaller bowl.
- Toss the apples with your sugar mix until all the apples are coated nicely.
- Take out your pie crust and pour the apple filling into the pan, there should be enough apples that there is a hill in the middle of the pie, thus why we need 9-10 apples for a larger pie pan.
- Dot the butter all over the top of the pie.
- Place your pie crust on top, I did a lattice top which is my favorite way when working with a lot of fruit that needs baking through and through.
- Cover the pie with tinfoil lightly – as in just set it on top gently- and bake in that magic bottom third at 425 degrees for 10 minutes. This is going to heat up the filling and get things going, but as we all know, the crust is going to start baking far too fast, this why we need to cover it up with tinfoil.
- Reduce the oven heat to 350°F , remove the tinfoil (but I always cover the edges of the pie) and then bake for another 55-60 minutes until bottom is deep golden brown and the apple filling is bubbling and thickened.
- Let cool on a rack and resist snacking!
Nutrition Information
All calories and info are based on a third party calculator and are only an estimate. Actual nutritional info will vary with brands used, your measuring methods, portion sizes and more.
Made this recipe?
Share a photo of what you made on Instagram or Facebook and tag me @thekitchenmagpie or hashtag it #thekitchenmagpie.
Please rate this recipe in the comments below to help out your fellow cooks!
Learn to cook like the Kitchen Magpie
A Very Prairie Christmas Bakebook
Cookies, Candies, Cakes & More: Vintage Baking to Celebrate the Festive Season!
Flapper Pie and a Blue Prairie Sky
A Modern Baker’s Guide to Old-Fashioned Desserts
The Prairie Table
Suppers, Potlucks & Socials: Crowd-Pleasing Recipes to Bring People Together


Wilf AKA Papa says
NAA! you don’t get to have an aniverary later. It’s like gone man, you just have to wait to make it up to Mike next July. (And Mike will make it up in July by taking you on vacation or something)