This post may contain affiliate links. See my privacy policy for details.
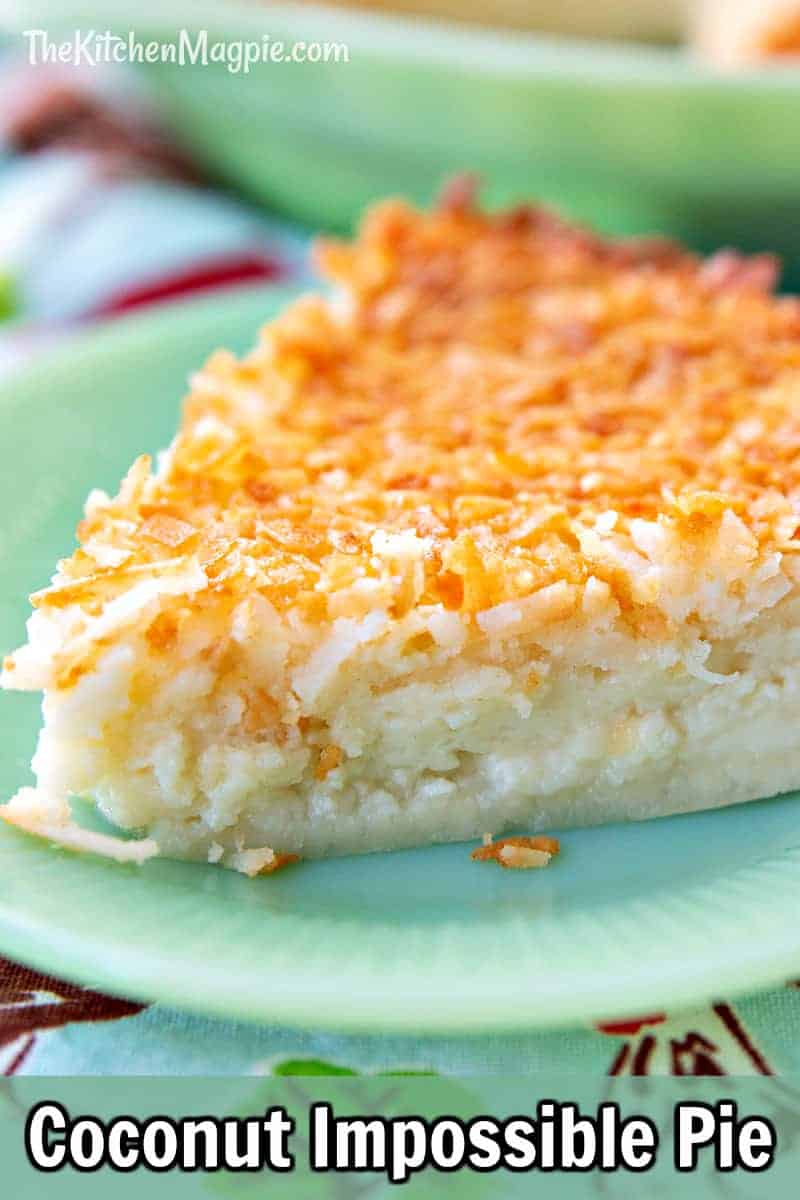
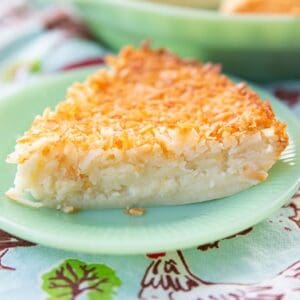
Take a trip back in time with this impossible scrumptious retro coconut impossible pie which is far from impossible to make (is there a Guinness world record for the number of times you can use “impossible” in one sentence?!).
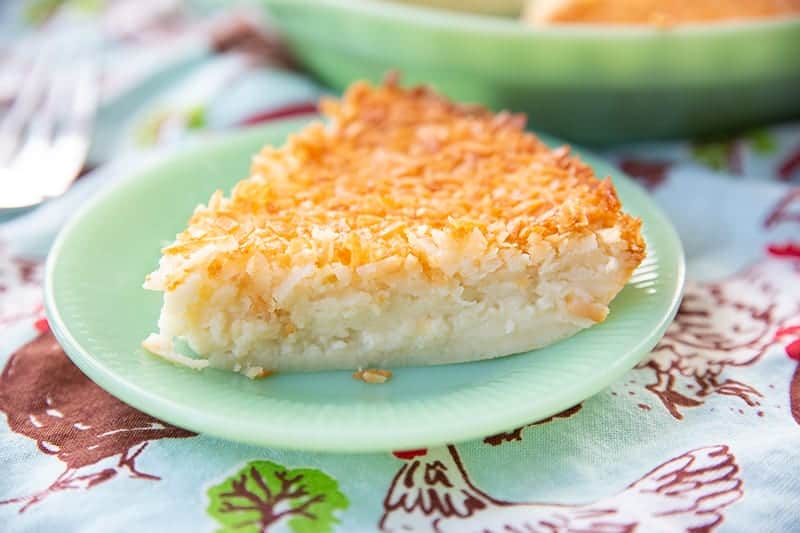
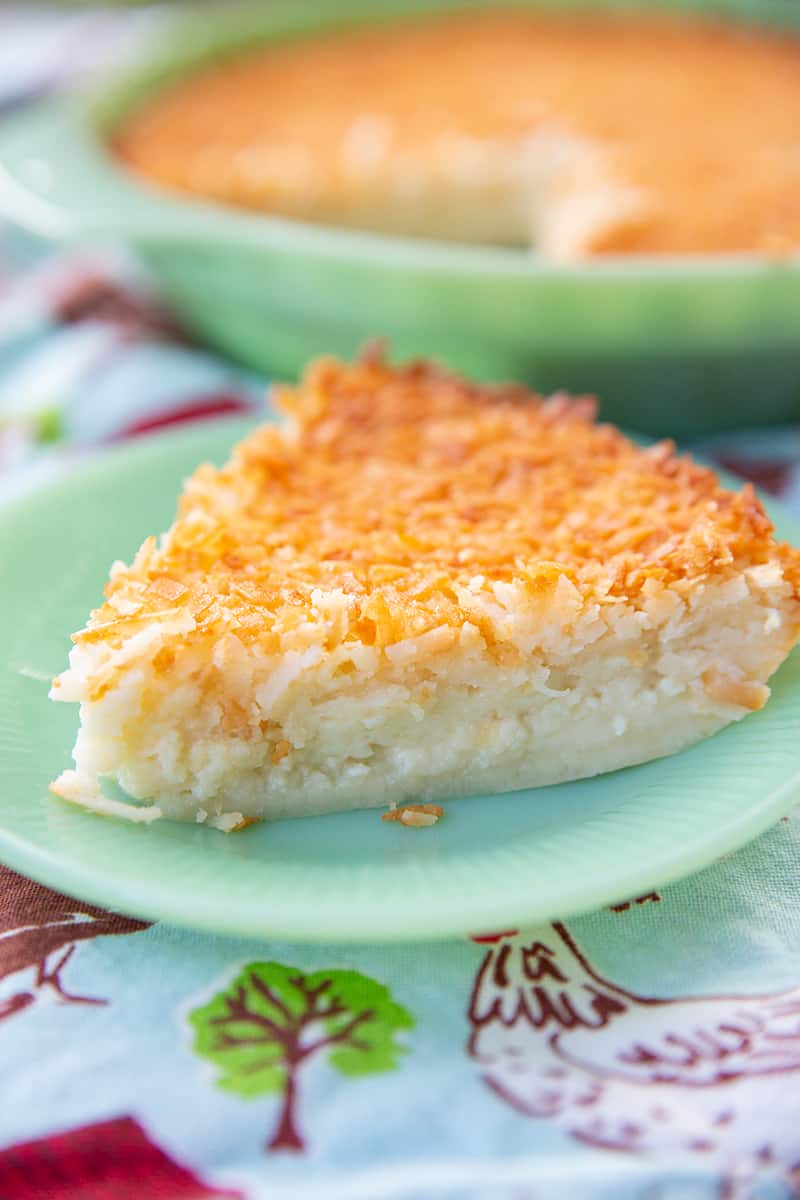
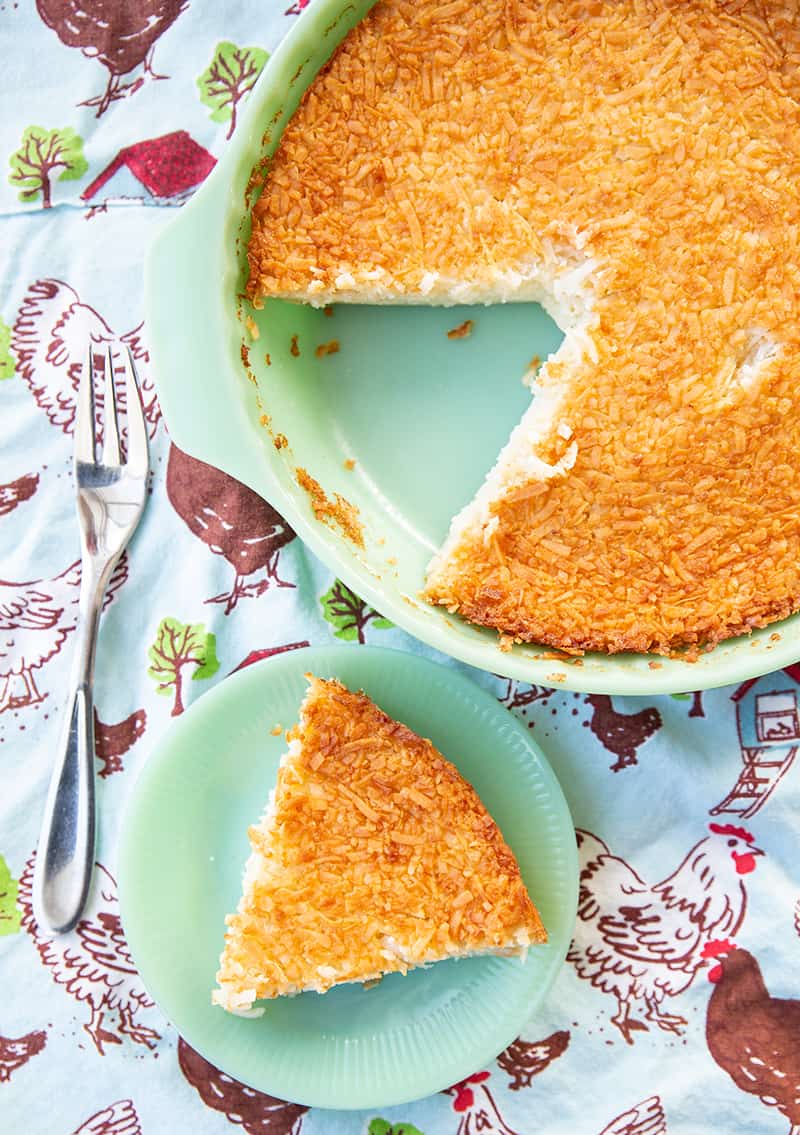
This retro delight is a great dessert to serve after a filling meal and always a winner at a bake sale too! The egg and custard filling is super smooth and creamy and it’s topped off with a layer of crunchy coconut! If you liked my coconut cream pie, you’ll definitely love this alternative.
Impossible Pie
This delicious crustless pie really started to become popular around the 1970’s and it took off from there. Its origins are pretty vague but a lot of people think it came from the South because of how popular coconut custard pie is there.
Honestly, this really is one of the easiest pies I’ve ever baked, especially since it somehow magically creates its own crust in the baking process! I honestly don’t think you’ll find a pie that’s easier to make, and it doesn’t leave much of a mess afterward either.
Why is it Called “Impossible Pie”?!
I’m pretty sure the name of this coconut delight really came from how easy it is to make. You literally dump all of the ingredients into the oven and let it do its thing and achieve the impossible – which involves forming its own crust and 3 super yummy layers!
How to Make Retro Coconut Impossible Pie
- Preheat your oven to 350°F and grease a 10-inch pie plate.
- Combine all of the ingredients except the coconut in a medium bowl until thoroughly blended into a smooth mix.
- Pour mixture into the pie plate and let it sit for 5 minutes.
- Sprinkle coconut evenly over the top.
- Place on a foil-lined baking sheet in the center of the oven and bake for 35-45 minutes or until golden brown on top.
- Insert a knife near the edge and if it comes out clean your pie is ready!
- After removing from the oven, let it cool. It will deflate and shrink a little but that’s completely normal!
- Serve at room temperature!
Don’t Worry If Your Filling is a Little Jiggly!
The filling in this pie will set as it cools, so don’t worry if it’s still a little jiggly when it’s meant to be “done”. That’s totally normal. Just let it sit for a while and it’ll turn out just fine!
What Should You Serve with this Delicious Dessert?
This pie is absolutely perfect on its own but I do like to add some whipped cream or vanilla ice cream to really give it that extra decadence! You can also add some fresh berries or sauce as well.
More Bisquick Impossible Recipes!
Now, my Saskatoon impossible pie is another great option, but did you know there is a Cheeseburger Impossible Pie as well? That one makes the best supper ever! Or really, you can also try my Bisquick Impossible Quiche, one of the most popular breakfasts on my website!
Happy baking!
Love,
Karlynn

Don’t forget to PIN THIS RECIPE to your Pies board and remember to FOLLOW ME ON PINTEREST!
Retro Coconut Impossible Pie
- Prep Time
- 5 minutes
- Cook Time
- 35 minutes
- Total Time
- 40 minutes
- Course
- Dessert
- Cuisine
- American
- Servings
- 8
- Calories
- 283
- Author
- Karlynn Johnston
Ingredients
- 3/4 cup white sugar
- 1/2 cup Original Bisquick™ mix
- 1/4 cup salted butter melted
- 2 cups milk
- 1 1/2 teaspoons vanilla
- 4 eggs
- 1 cup flaked or shredded coconut
Instructions
- Preheat your oven to 350°F. Grease a 10-inch pie plate.
- In medium bowl, mix together all ingredients except the coconut until smooth and blended.
- Pour into a greased 10″ pie plate. This will puff, so don’t fill your dish to the very top. Let it sit for 5 minutes to allow the ingredients to settle properly, then sprinkle the coconut evenly across the top.
- Place on a foil-lined baking sheet with a raised edge (to prevent spills) and place in the center of the middle rack of the oven.
- Bake for 35-45 minutes, or until the top is golden brown, the center is slightly jiggly, and a knife inserted near the edge comes out clean.
- Remove from the oven and allow it to cool to completely. Like a souffle, this will deflate as it cools, so don’t panic if you notice shrinkage.
- Serve at room temperature for best results. Leftovers should be stored in the refrigerator. Serves 6-8, depending on serving size.
Recipe Notes
Nutrition Information
All calories and info are based on a third party calculator and are only an estimate. Actual nutritional info will vary with brands used, your measuring methods, portion sizes and more.
Made this recipe?
Share a photo of what you made on Instagram or Facebook and tag me @thekitchenmagpie or hashtag it #thekitchenmagpie.
Please rate this recipe in the comments below to help out your fellow cooks!
Learn to cook like the Kitchen Magpie
A Very Prairie Christmas Bakebook
Cookies, Candies, Cakes & More: Vintage Baking to Celebrate the Festive Season!

Flapper Pie and a Blue Prairie Sky
A Modern Baker’s Guide to Old-Fashioned Desserts
The Prairie Table
Suppers, Potlucks & Socials: Crowd-Pleasing Recipes to Bring People Together


Patricia Prescott says
Recipe is a 5 star.
Amelia says
It’s called “impossible” because it makes it’s own crust as it cooks. The last time I made this was 1977, then I lost the recipe. I had forgotten about it until today and went searching on Google.
Diane says
Can you use Gluten-free Bisquick? Thanks!!!!
luci vasseur says
My husband and I ate the entire pie in one day!!
Susan says
is it possible to make this as a gluten free option?
Karlynn says
If there is a Bisquick gluten-free baking mix then yeah you can make it gluten-free and making sure any and all other ingredients are gluten free.
Karlynn Johnston says
I love a good, fast recipe that the kids love! I love little cheats like Bisquick that help save time!
Karolyn Postawko says
I made a similar recipe years ago and put it all in the blender to mix. Can I do that with this recipe?
Barbara Karr says
It is so great you are reviving the “Imossible Pies”. I made these years ago and they were life savers. Through the years and today I still make the Impossible
Bacon Pie. A lot of young moms will enjoy these. Fast, frugal, and tasty. No guilt because they are family friendly. Thanks for the walk down memory lane!
NanaBread (Jeanne) says
Hooray! So happy to be able to help out with a pie recipe. As a rabid Pie-Day Friday fan, it was the very least I could do to help a friend out. Hope you had a wonderful trip. Can’t wait to hear all about it! -jeanne